App control 서버 설치 전, SQL 설치가 선행되어야 합니다.
[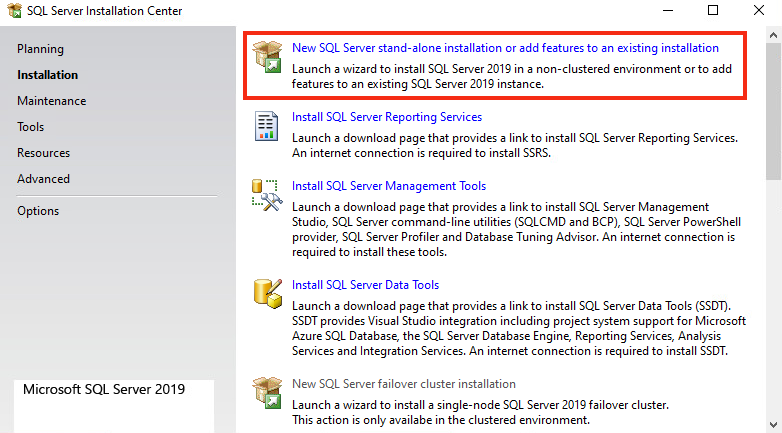](https://bs.etevers.tech/uploads/images/gallery/2024-01/RGqimage.png) \- 'SQL Server Installation Center' 실행 > 'New SQL Server stand-alone Installation' 버튼을 클릭하여 설치 진행 [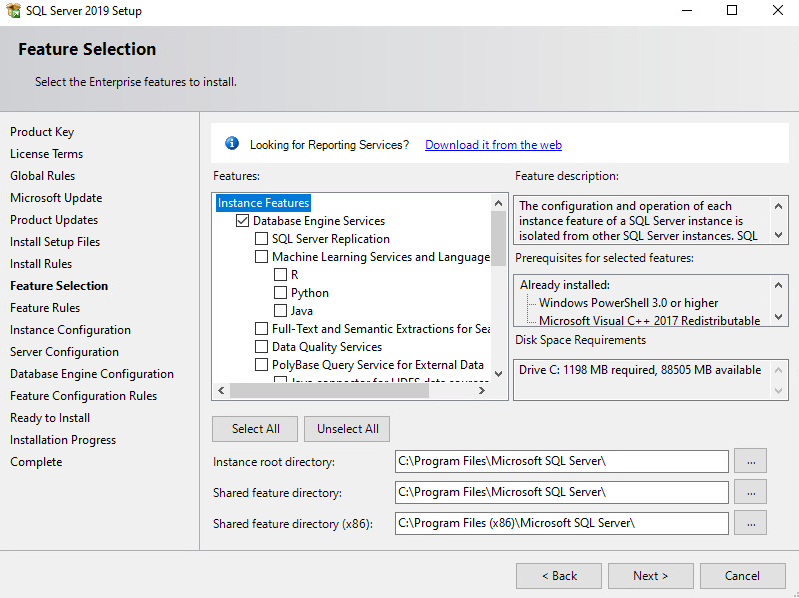](https://bs.etevers.tech/uploads/images/gallery/2024-01/lqDimage.png) \- 'Database Engine Servies' 및 'Client Tools Connectivity' 체크박스 선택 [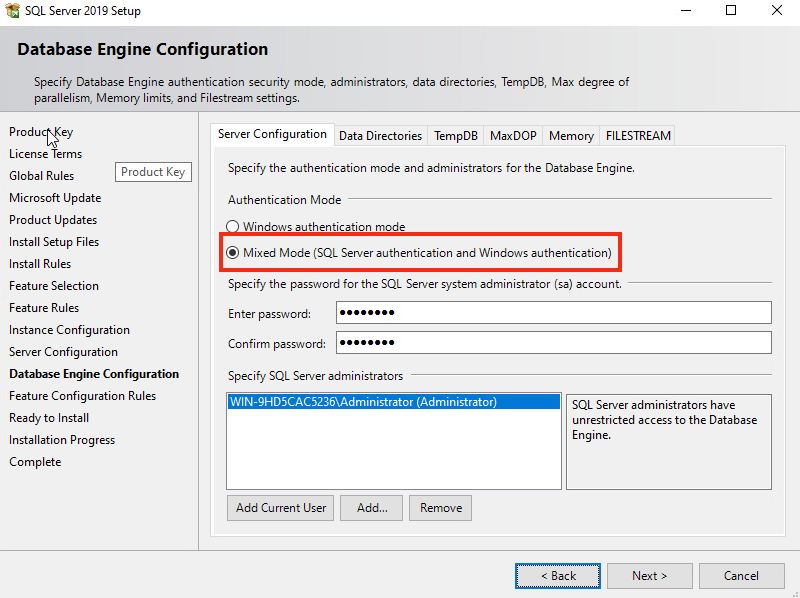](https://bs.etevers.tech/uploads/images/gallery/2024-01/2OYimage.png) \- 'Mixed Mode' 를 선택하고, SQL Server administrator 계정에서 사용할 패스워드 입력 \- \[Add Current User\] 선택하여 사용할 Windows 계정 추가 [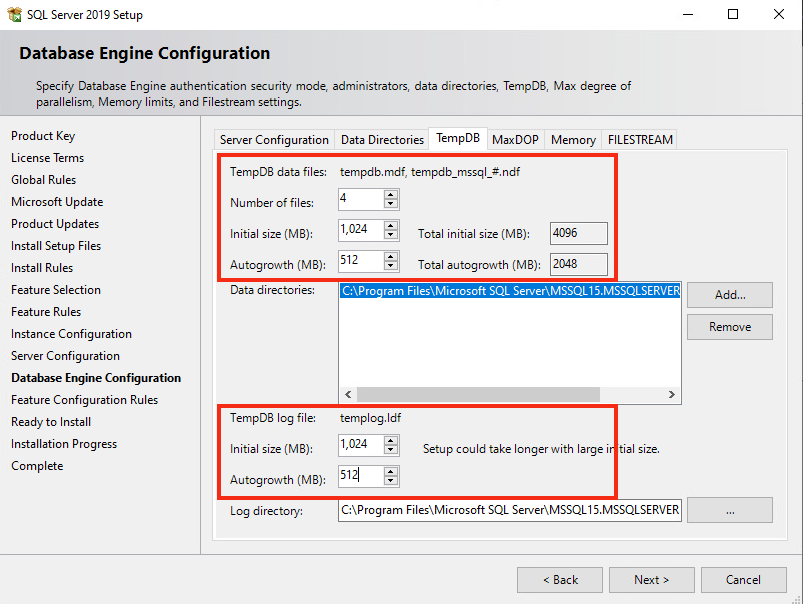](https://bs.etevers.tech/uploads/images/gallery/2024-01/cZLimage.png)\* 선택 사항 \- TempDB 선택하여 'data files' 및 'log flie' 크기 사이즈 지정 [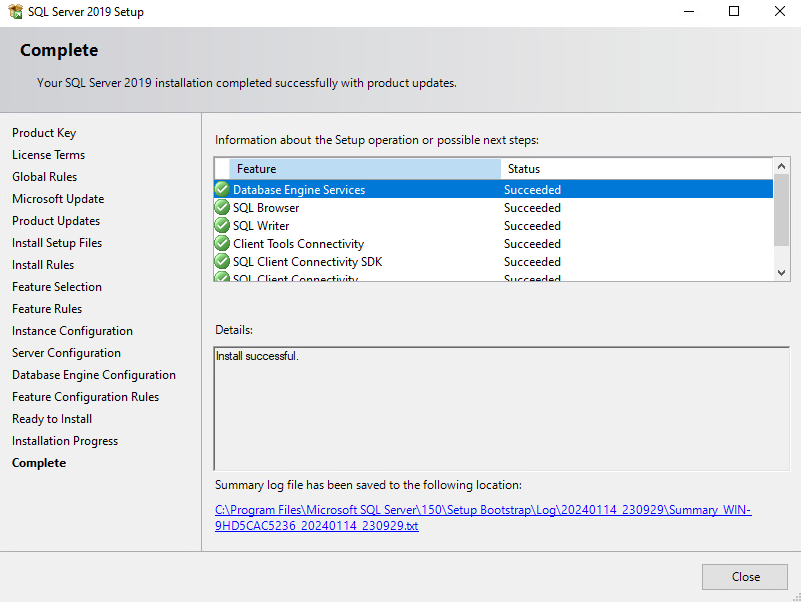](https://bs.etevers.tech/uploads/images/gallery/2024-01/Awiimage.png) \- MS SQL Server 설치 완료 확인 [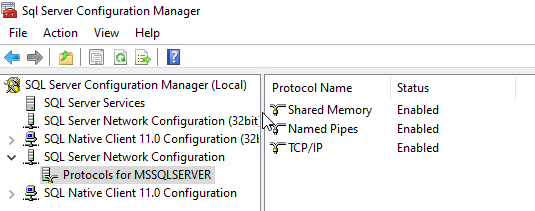](https://bs.etevers.tech/uploads/images/gallery/2024-01/x9limage.png) \- 'Sql Server Configuration Manager' 실행하여 DB 접속에 사용할 프로토콜 확인 [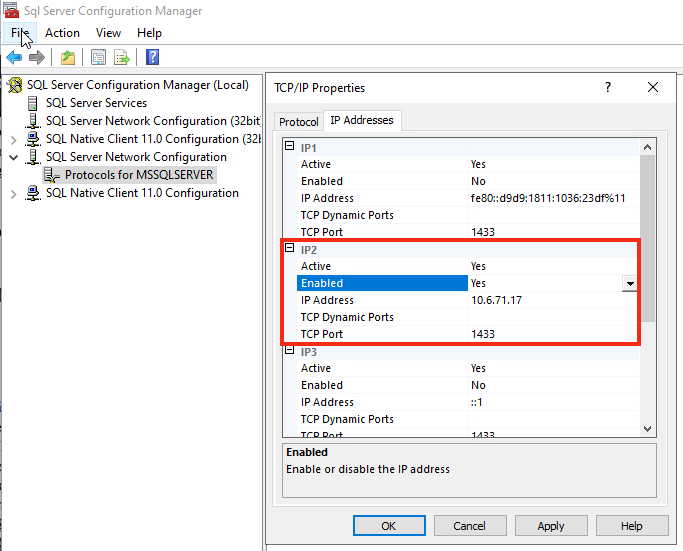](https://bs.etevers.tech/uploads/images/gallery/2024-01/0e4image.png) \- TCP/IP 사용의 경우, 'TCP/IP' 활성화 설정 진행 \- 활성화 작업 완료 후 SQL Server 서비스 재실행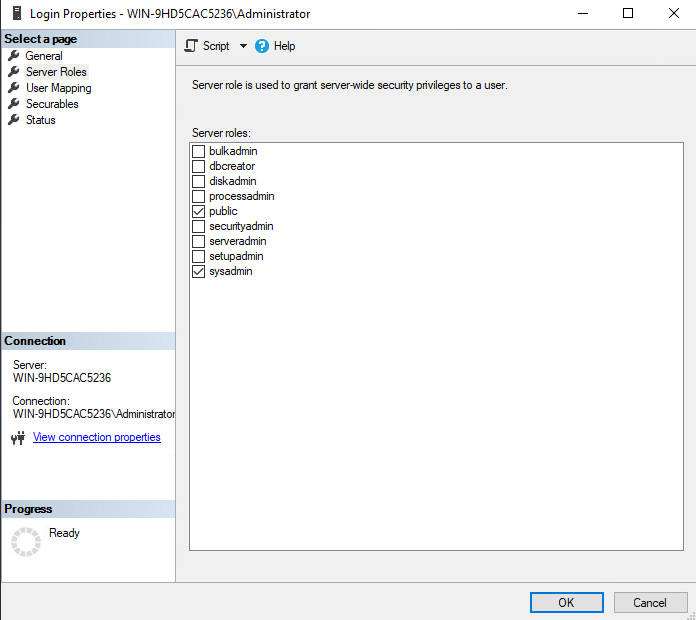- DB 엑세스 계정에 대한 'sysadmin' 권한 할당 ### 2. App Control Server 설치 참고 문서 : [https://docs.vmware.com/en/VMware-Carbon-Black-App-Control/8.10/cb-ac-server-installation-guide/GUID-17F7BE89-2E6F-4F69-92F8-0FA8F562E454.html](https://docs.vmware.com/en/VMware-Carbon-Black-App-Control/8.10/cb-ac-server-installation-guide/GUID-17F7BE89-2E6F-4F69-92F8-0FA8F562E454.html) [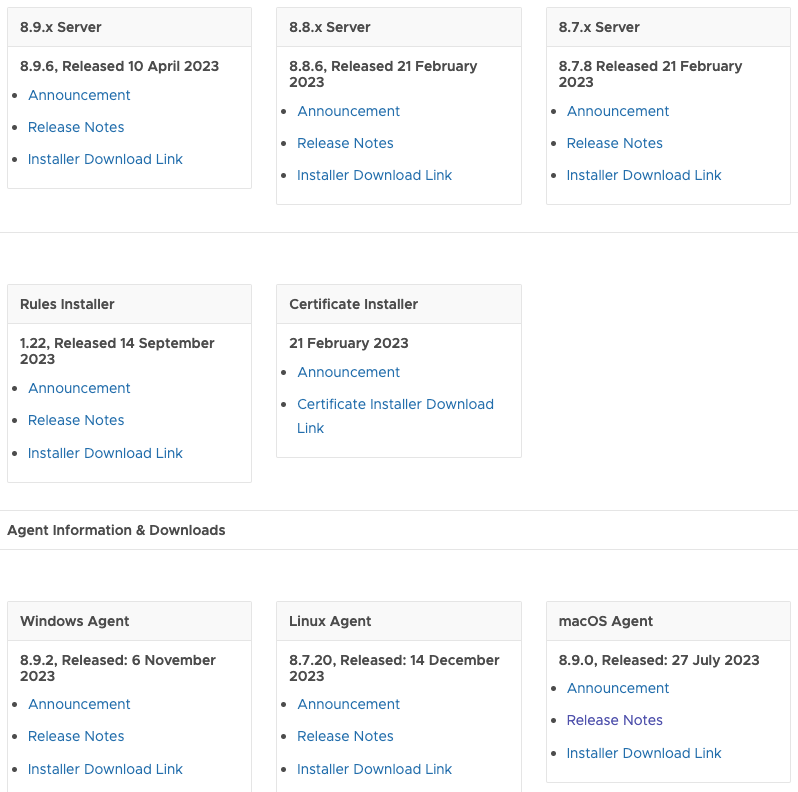](https://bs.etevers.tech/uploads/images/gallery/2024-01/n3Jimage.png) \- App Control 인스톨러 다운로드 - Server Installer 다운로드 - Rules Installer 다운로드 - Certificate Installer 다운로드 - Agent Installer 다운로드 (MAC, Windows, Linux)다운로드 : https://docs.vmware.com/en/VMware-Carbon-Black-App-Control/services/cb-appc-release-info/GUID-97815946-2AA4-4488-BC12-B8DCABEBFE56.html
[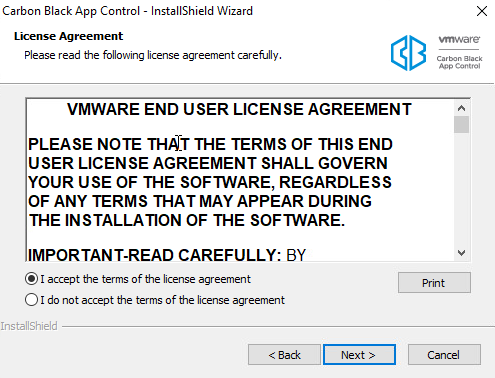](https://bs.etevers.tech/uploads/images/gallery/2024-01/nrqimage.png) \- ParityServerSetup.exe 프로그램 실행 및 라이선스 동의 [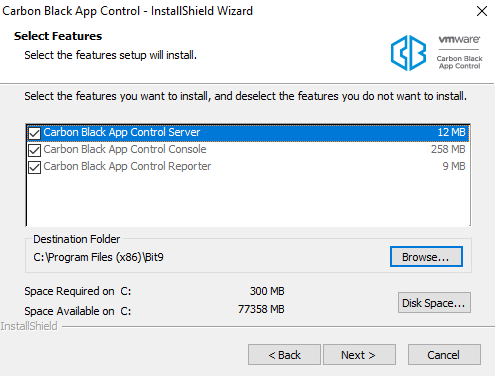](https://bs.etevers.tech/uploads/images/gallery/2024-01/ZNjimage.png) \- 설치 진행할 기능 및 설치 위치, 용량 확인 [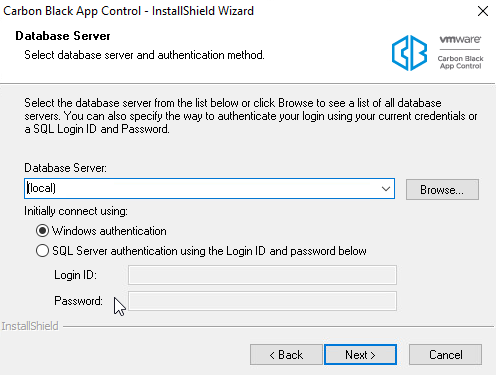](https://bs.etevers.tech/uploads/images/gallery/2024-01/eL6image.png) \- (동일 환경에 DB가 설치된 경우) Database 서버 위치 '(local)' 선택 및 인증 방법 선택 \- (외부 환경에 DB가 설치된 경우) Database 서버 위치 'FQDN or IP' 입력 및 인증 방법 선택 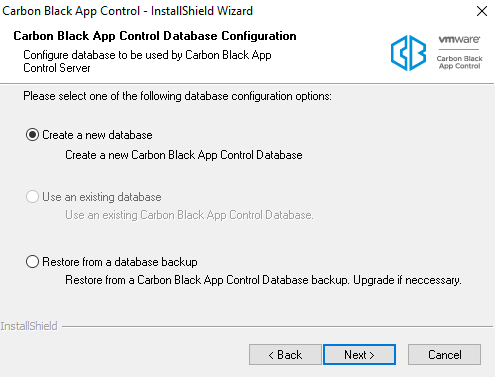- 신규 설치의 경우, Create a new database 선택하여 신규 생성 \* 기존 데이터베이스 사용의 경우, Use a exiting database 선택 [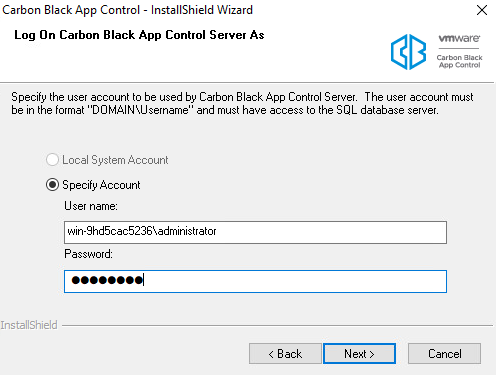](https://bs.etevers.tech/uploads/images/gallery/2024-01/UDEimage.png) \- App Control Server와 SQL Server 에 엑세스 가능한 Windows 사용자 계정 지정 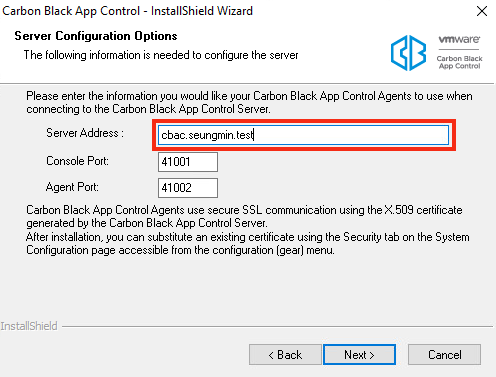 \- App Control 웹 콘솔 접속에 사용할 IP or FQDN 정보 입력 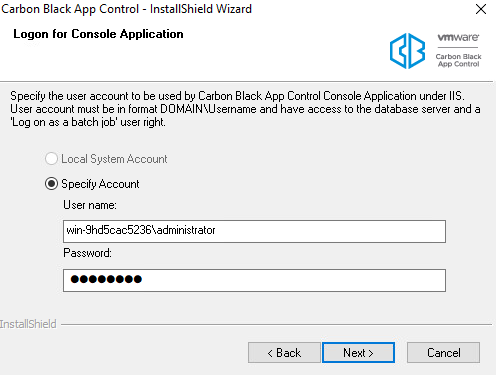- App Control 웹 콘솔 IIS 서비스에 사용할 Windows 사용자 계정 지정 (App Control Server 및 SQL Server 엑세스 가능 계정) [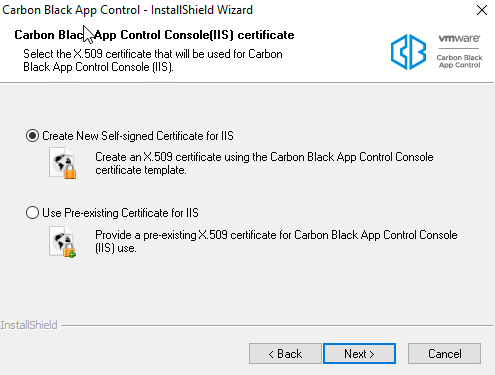](https://bs.etevers.tech/uploads/images/gallery/2024-01/TURimage.png) \- App Control 웹 콘솔 인증서 선택 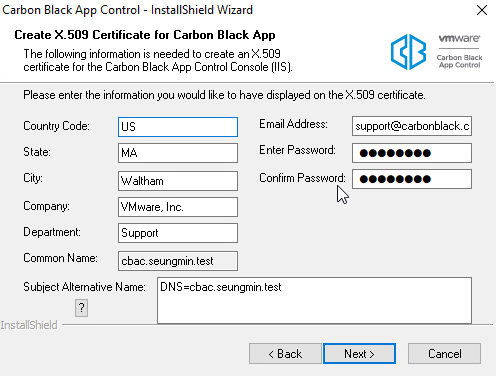-- (Create New Self-signed Certificate for IIS 옵션 선택) 자체 인증서가 없는 경우 Carbon Black 인증서 신규 생성 [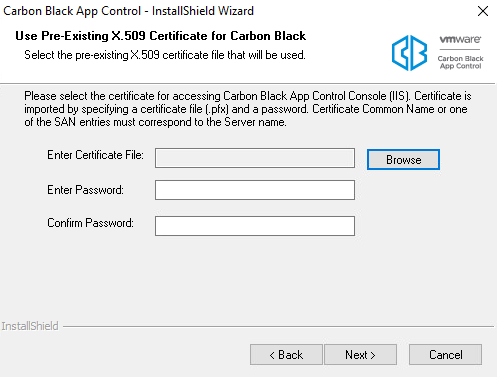](https://bs.etevers.tech/uploads/images/gallery/2024-01/fqximage.png) \-- (Use Pre-existing Certificate for IIS 옵션 선택) 자체 인증서가 있는 경우 인증서 업로드 사용 [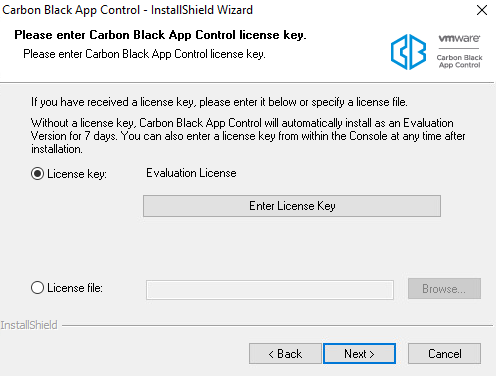](https://bs.etevers.tech/uploads/images/gallery/2024-01/TdGimage.png) \- App Control 라이선스 입력 (7일간의 평가판 라이선스 제공) [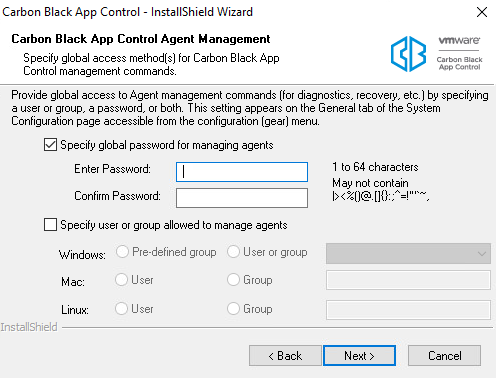](https://bs.etevers.tech/uploads/images/gallery/2024-01/mUKimage.png) \- 관리 시에 사용될 엔드포인트 에이전트에 대한 패스워드 입력 (생략 가능) [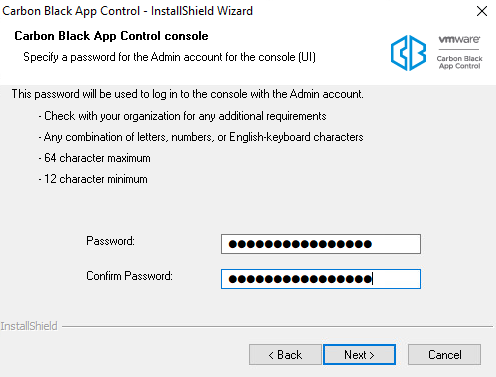](https://bs.etevers.tech/uploads/images/gallery/2024-01/xlIimage.png) \- App Control 웹 콘솔 admin 패스워드 입력 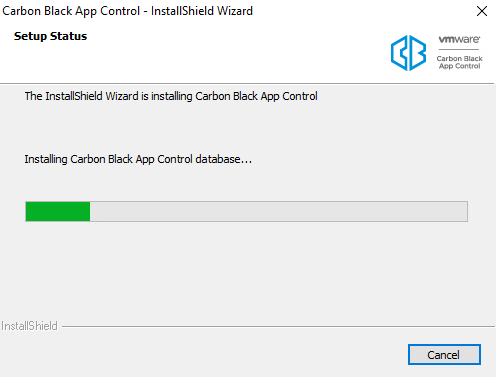- 설치 진행 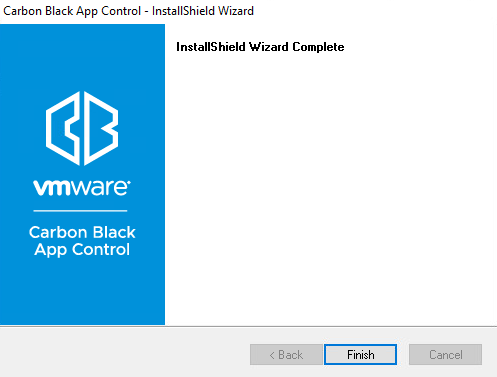- 설치 완료 \* 오프라인 서버 설치 시 : Certificate Install 필요 ### 3. App Control 설치 확인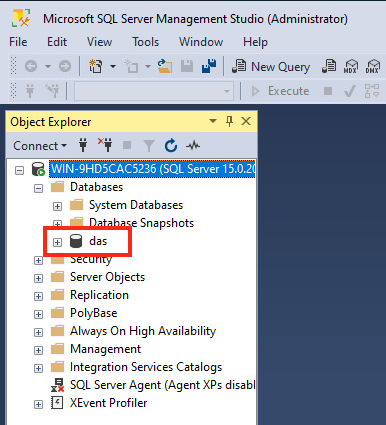 \- App Control 서버에서 생성한 'das' DB 생성 확인 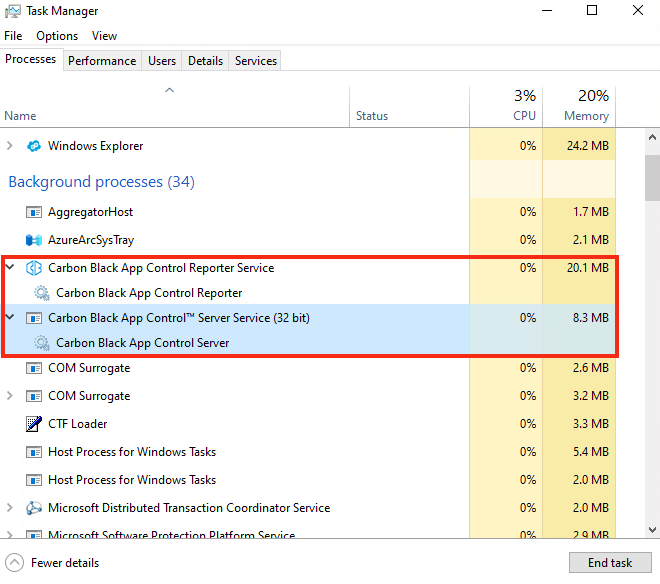- 로컬 '작업 관리자' 의 프로세스 동작 확인 - Carbon Black App Control Reporter Service 프로세스 - Carbon Black App Control Server Service 프로세스 ### 4. App Control 초기 설정 #### 4.1 라이선스 적용 - 오른쪽 상단의 \[Settings\] > \[System Configuration\] 메뉴 선택 [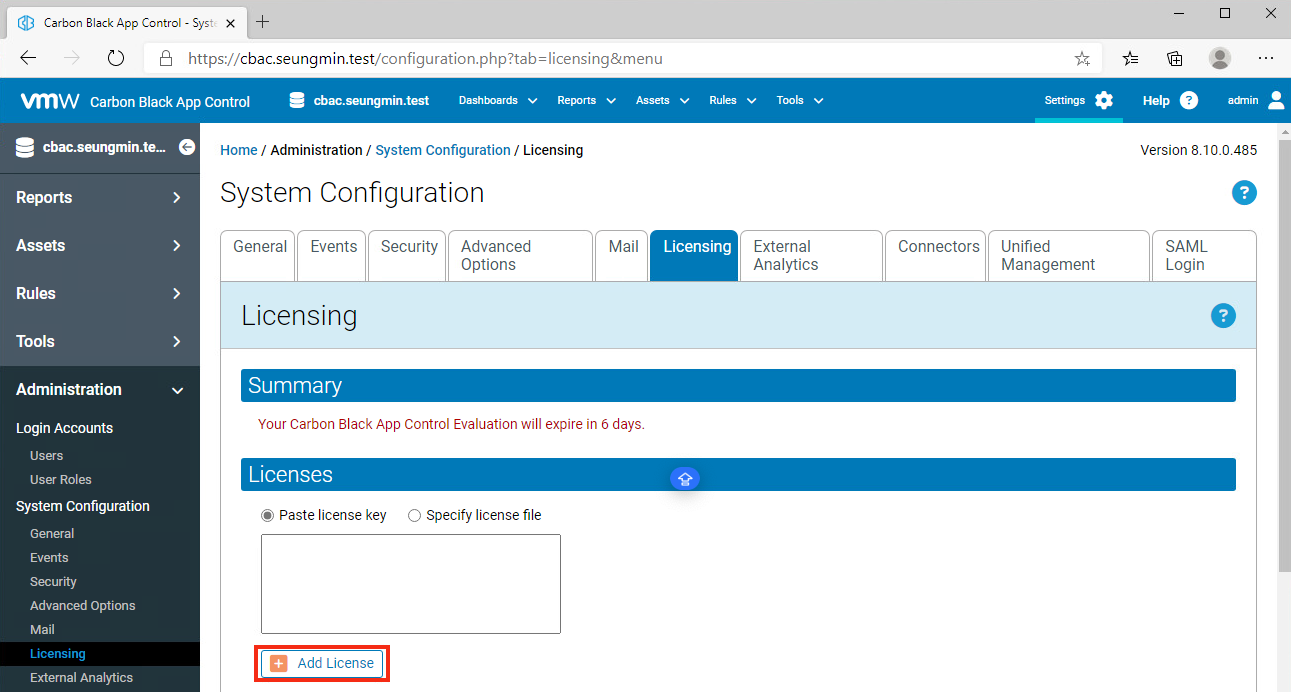](https://bs.etevers.tech/uploads/images/gallery/2024-01/NVTimage.png) \- \[Licensing\] 탭 이동 > '라이선스 파일 선택' 후 \[Add License\] 버튼 클릭하여 라이선스 적용 #### 4.2 에이전트 및 룰 업로드 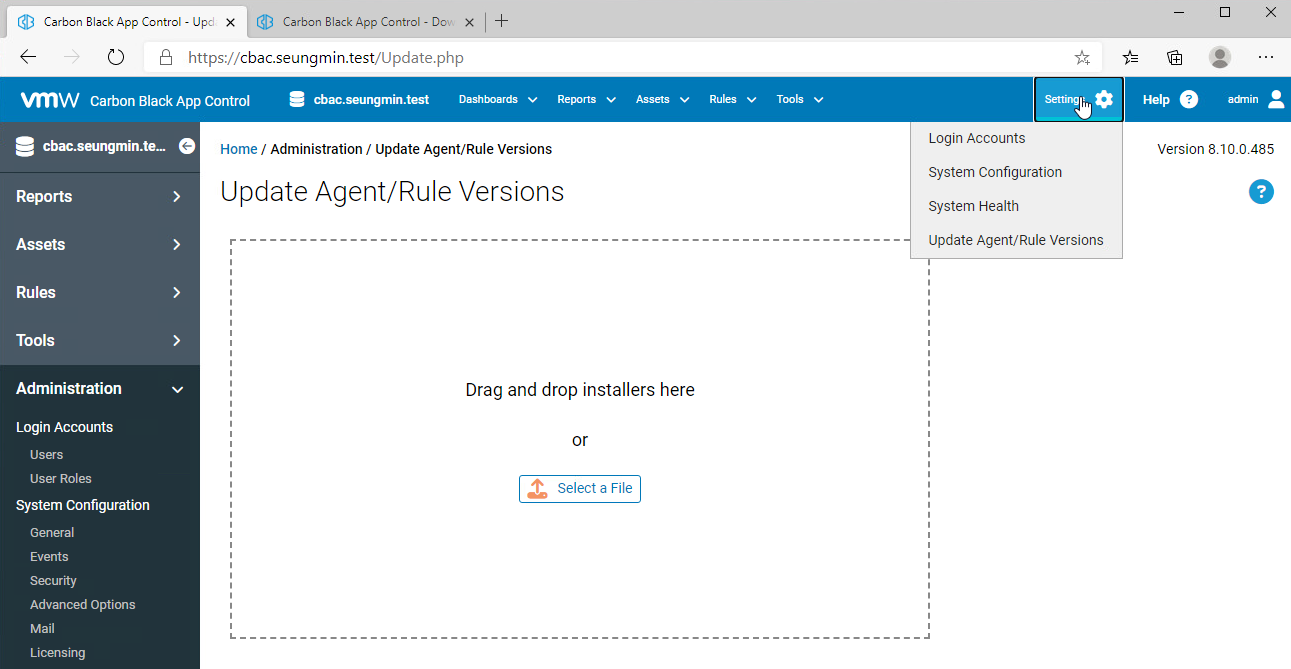 \- 오른쪽 상단의 \[Settings\] > \[Update Agent/Rule Version\] 메뉴 이동 [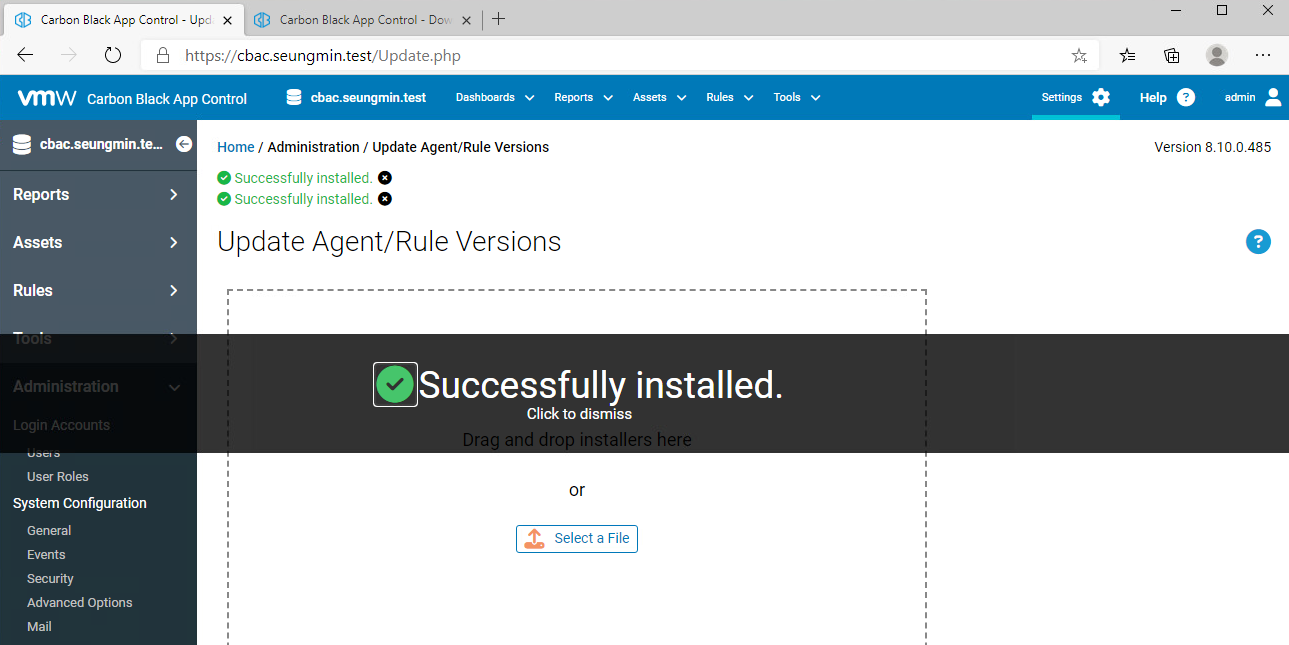](https://bs.etevers.tech/uploads/images/gallery/2024-01/islimage.png) \- 'Select a File' 또는 '드래그 앤 드롭' 방식으로 룰 및 OS 별 에이전트 업로드 - LinuxHostPackageInstaller.exe - WindowsHostPackageInstaller.exe - MacHostPackageInstaller.exe - RulesInstaller.exe [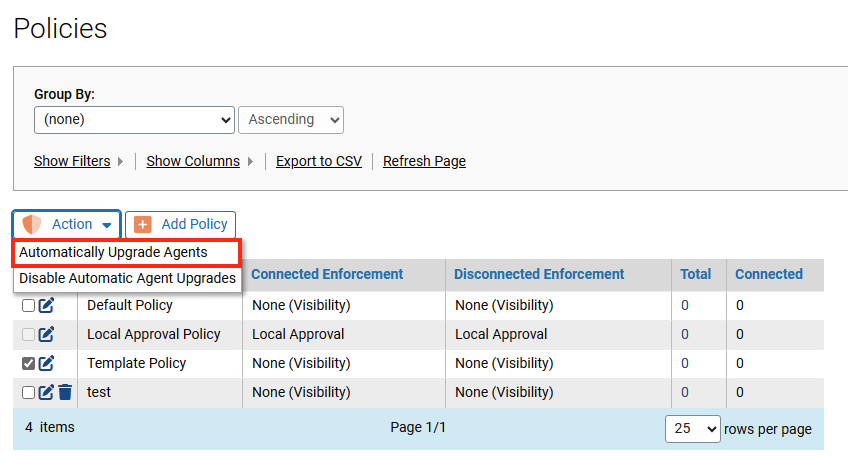](https://bs.etevers.tech/uploads/images/gallery/2024-01/8jAimage.png) \- \[Rules\] > \[Polices\] 메뉴 이동하여 룰 생성 및 에이전트 룰 적용 [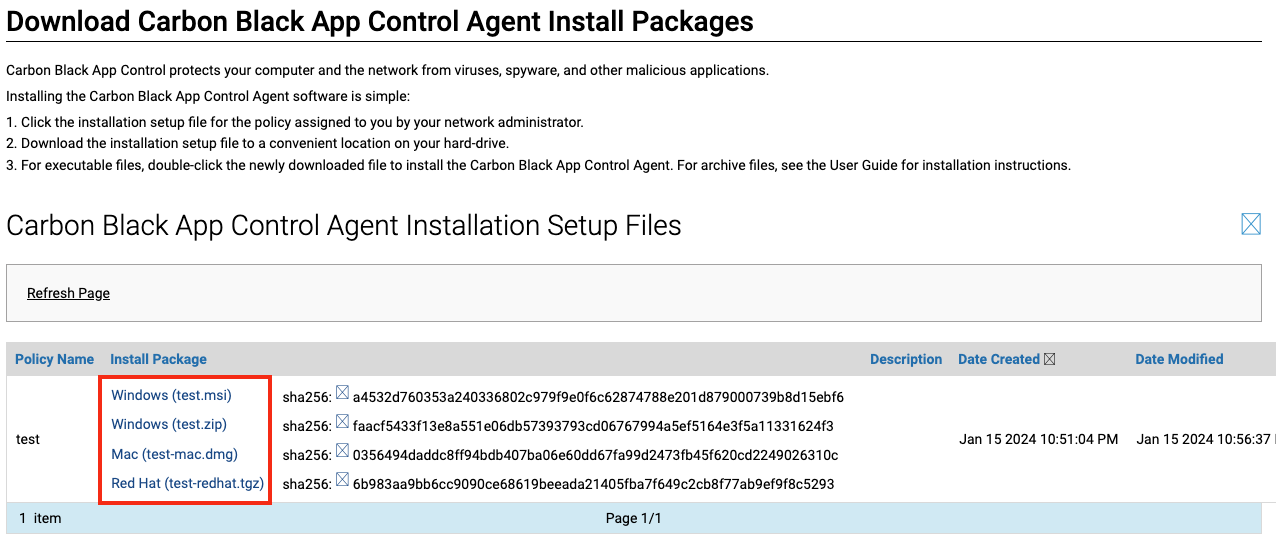](https://bs.etevers.tech/uploads/images/gallery/2024-01/6xCimage.png) \- 에이전트 다운로드 페이지로 이동하여 에이전트 업로드 확인에이전트 다운로드 페이지 : [https://IP](http://IP) or FQDN/hostpkg/