VMware Carbon Black Community URL : **https://community.carbonblack.com**
[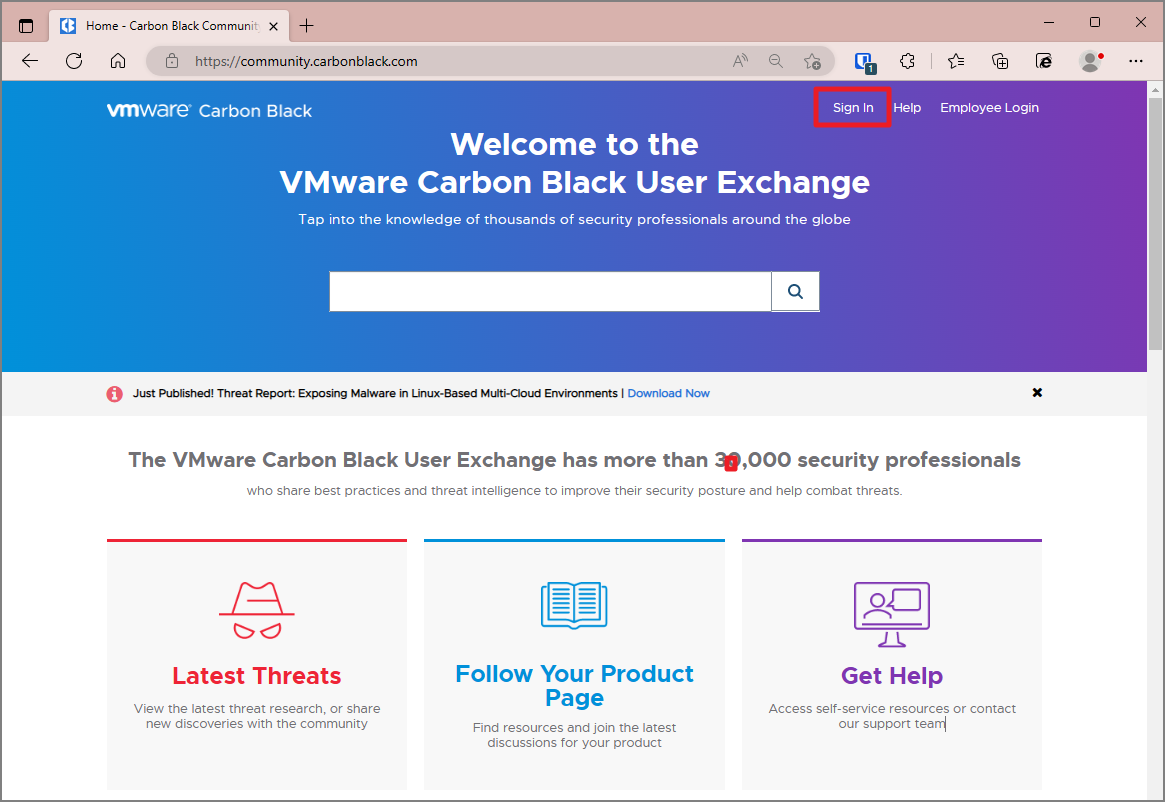](https://bs.etevers.tech/uploads/images/gallery/2023-02/GQ2image.png) 오른쪽 상단에 위치한 \[Sign in\] 버튼을 클릭합니다. [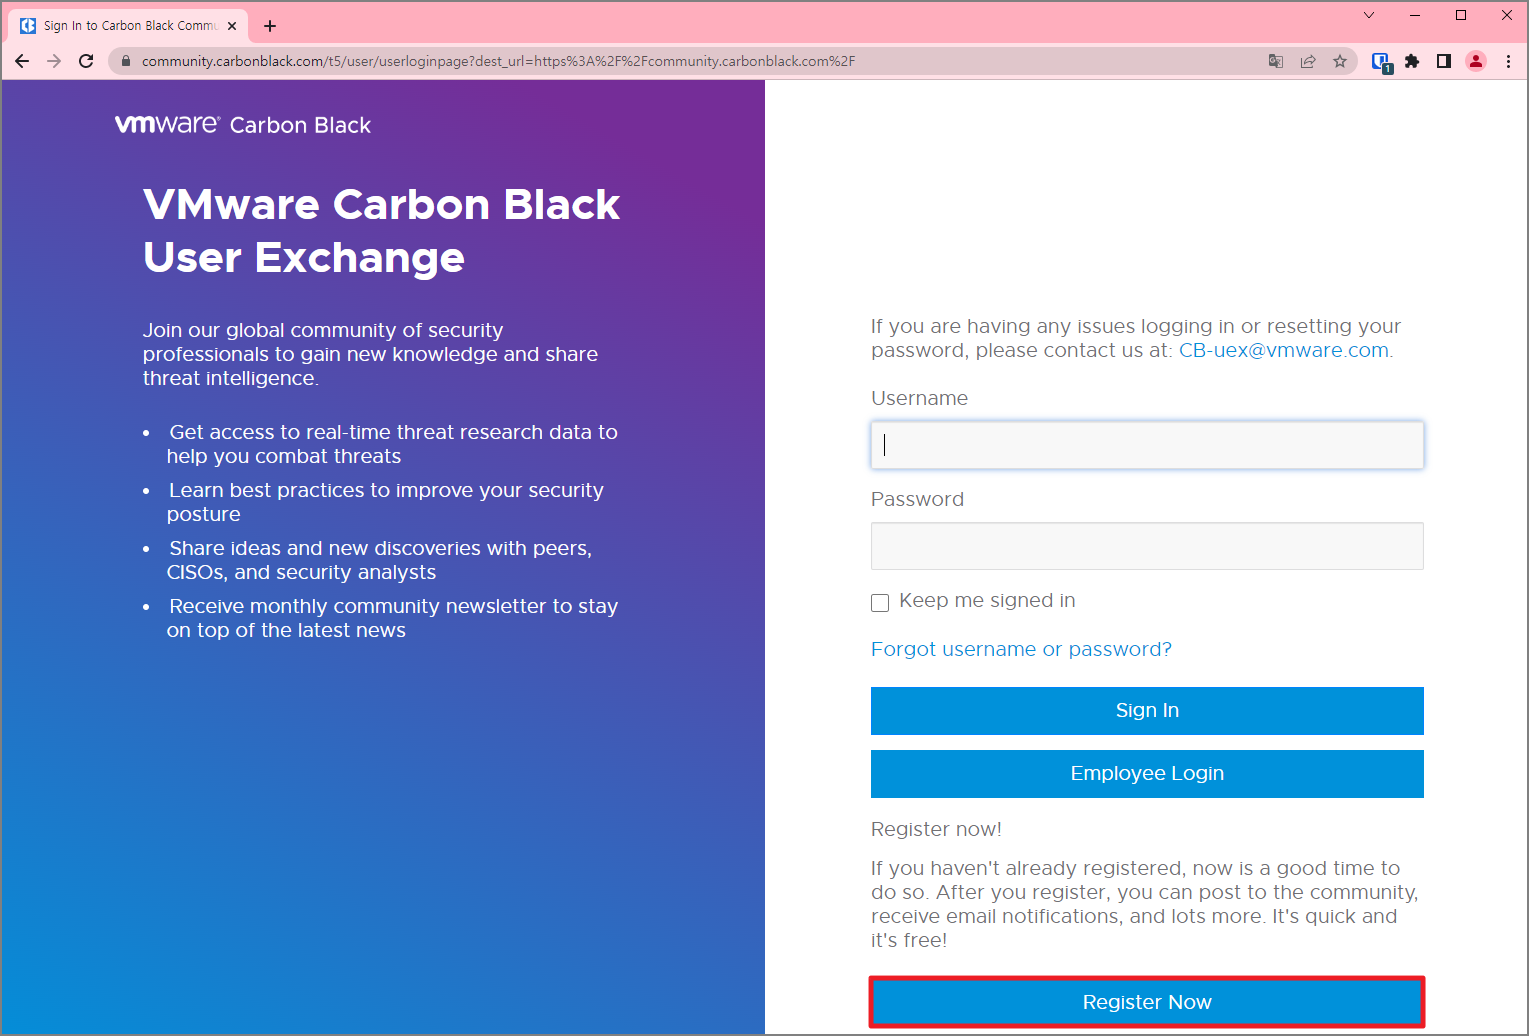](https://bs.etevers.tech/uploads/images/gallery/2023-02/Wfnimage.png) \[Register Now\] 버튼을 선택하여 회원가입을 진행합니다. [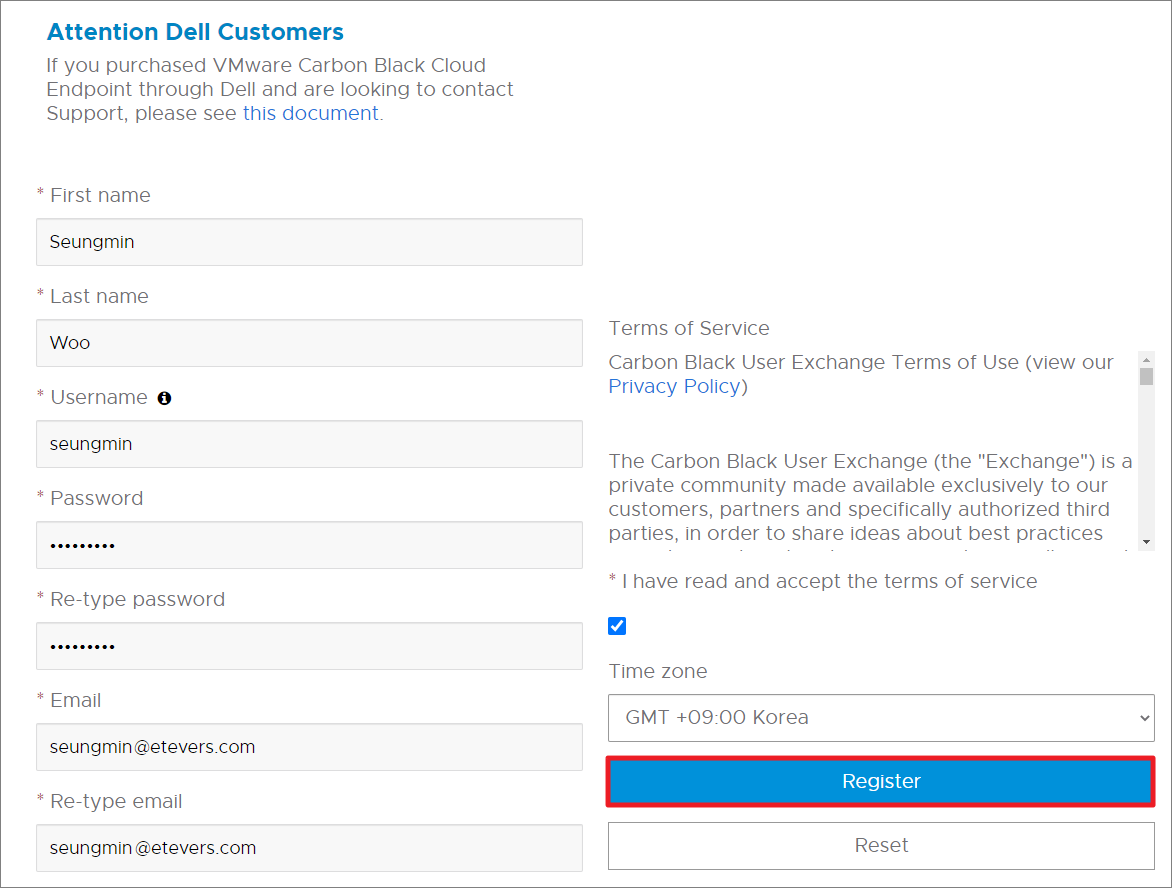](https://bs.etevers.tech/uploads/images/gallery/2023-02/GDQimage.png) 정보 기입 후 \[Register\] 버튼을 클릭하여 계정 생성을 완료 합니다. \* Username 은 Carbon black Community 접속 계정을 의미합니다.최초 가입 시, 일부 기능에 대한 권한이 제한 되어 있습니다. 권한 추가 작업이 필요하므로, 아래 내용 작성하여 '총판 SE Email' 로 전달 부탁 드립니다. **- 직함 :** **- 계정 :** **- 이메일 :**
### 추가 계정 등록 해당 절차는 권한을 가진 admin 계정으로 진행합니다. [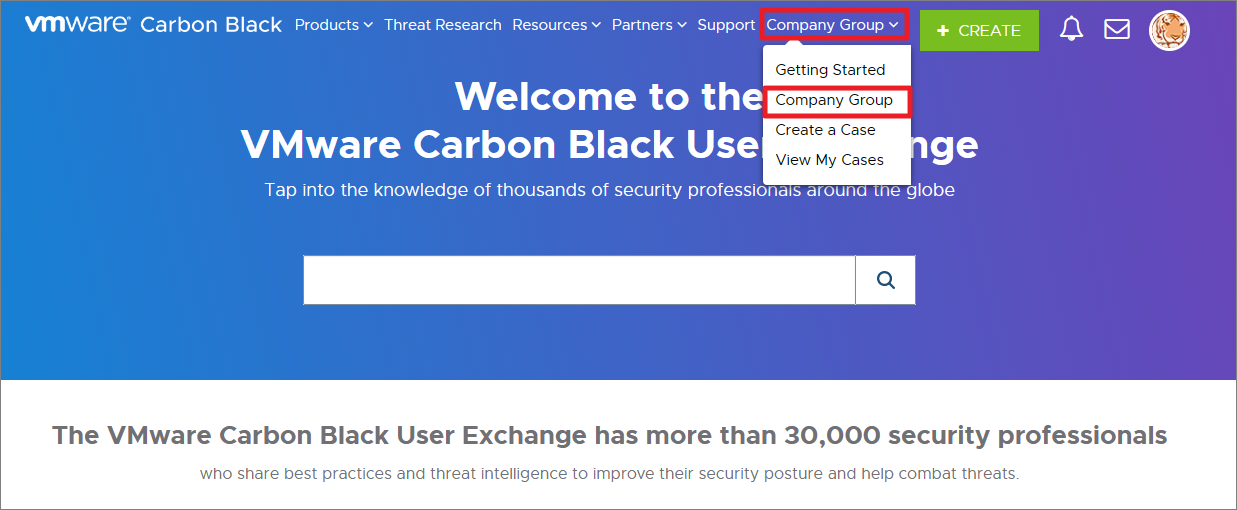](https://bs.etevers.tech/uploads/images/gallery/2023-03/zzFimage.png) \[Company Group\] > \[Company Group\] 메뉴로 이동합니다. [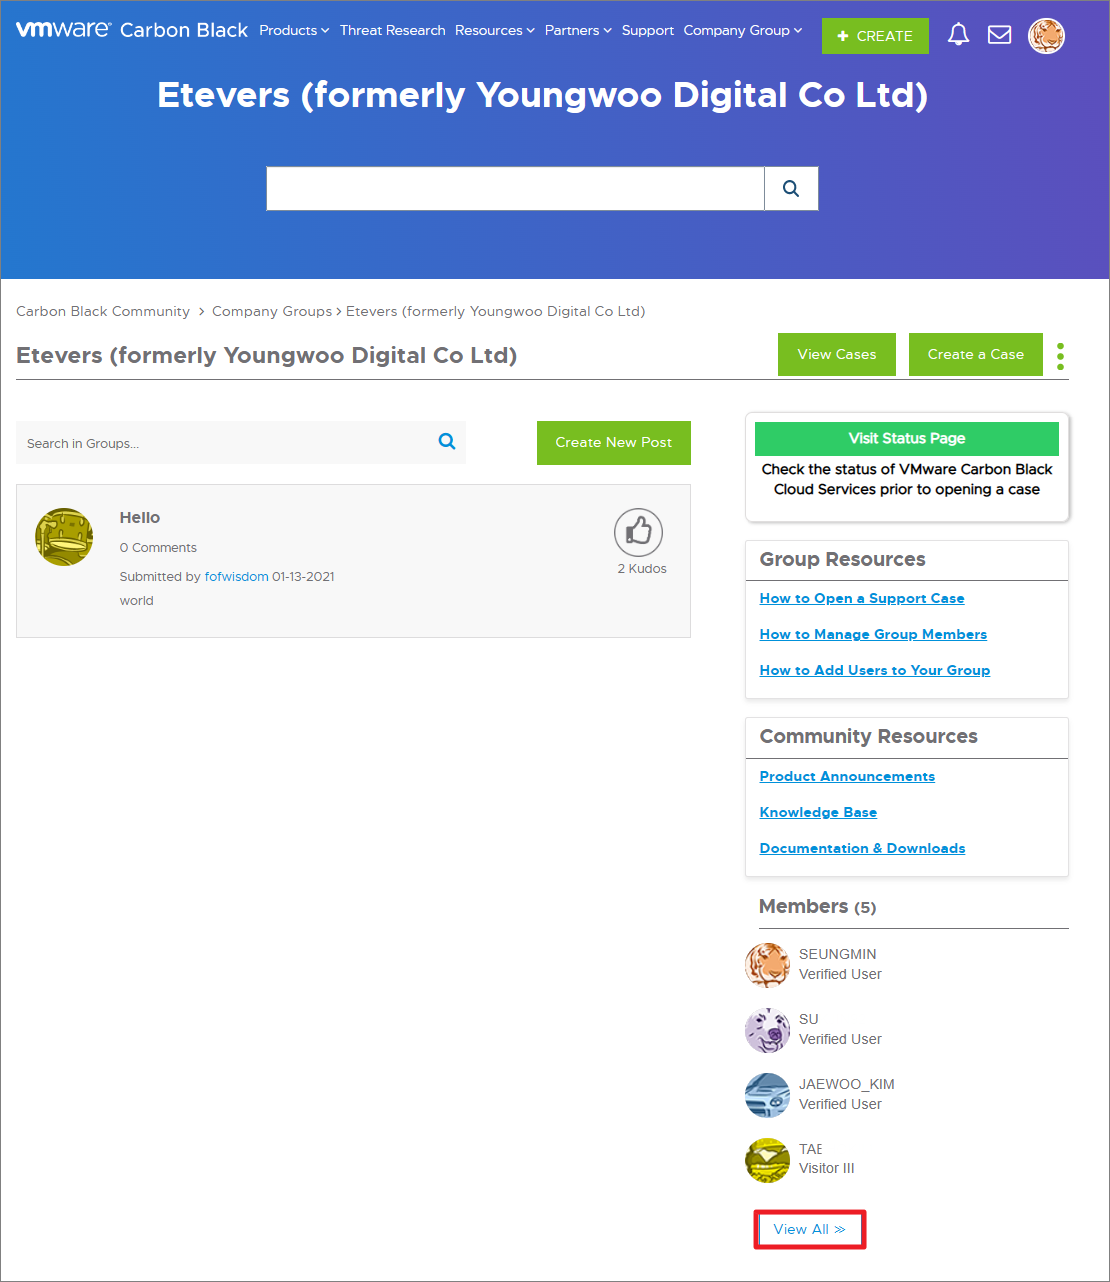](https://bs.etevers.tech/uploads/images/gallery/2023-03/ZX4image.png) \[Members\] > \[View All\] 버튼을 눌러 Group Details 페이지로 이동합니다. [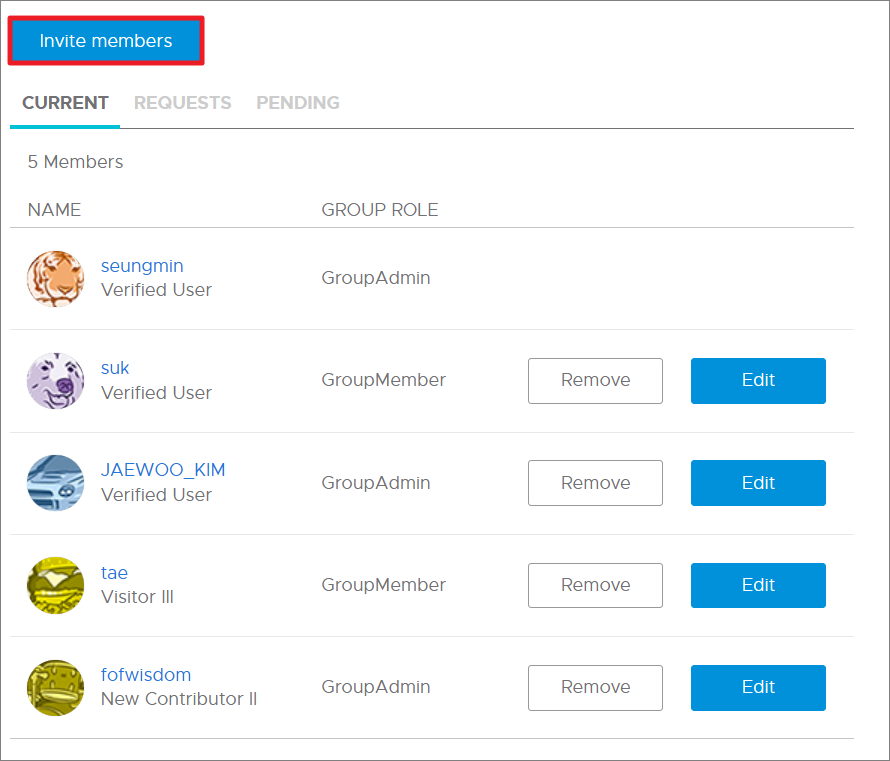](https://bs.etevers.tech/uploads/images/gallery/2023-03/ulwimage.png) \[Invite members\] 버튼을 클릭하여 사용자를 초대합니다. ### 계정 권한 변경 및 제거 해당 절차는 권한을 가진 Admin 계정으로 진행합니다. [](https://bs.etevers.tech/uploads/images/gallery/2023-03/zzFimage.png) \[Company Group\] > \[Company Group\] 메뉴로 이동합니다. [](https://bs.etevers.tech/uploads/images/gallery/2023-03/ZX4image.png) \[Members\] > \[View All\] 버튼을 눌러 Group Details 페이지로 이동합니다. [](https://bs.etevers.tech/uploads/images/gallery/2023-03/10oimage.png) ① 사용자를 그룹에서 삭제합니다. ② 사용자의 권한을 수정합니다. ## Support Request ### 생성 Carbon Black 운영 시에 오류, 문의 등에 대한 기술 지원이 필요할 시 사용합니다. [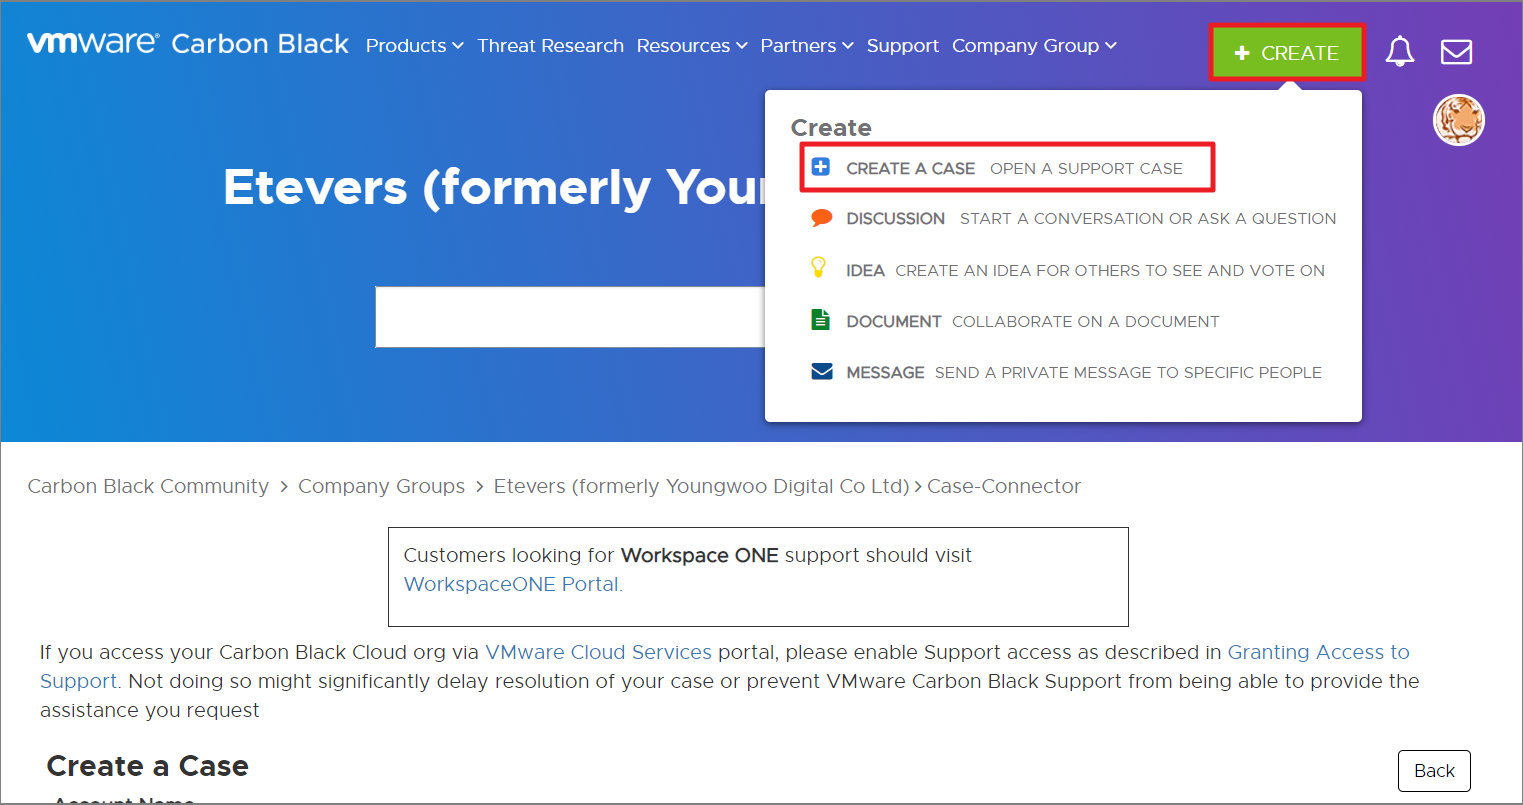](https://bs.etevers.tech/uploads/images/gallery/2023-02/07vimage.png) \[CREATE\] > \[CREATE A CASE\] 메뉴에 접속합니다. [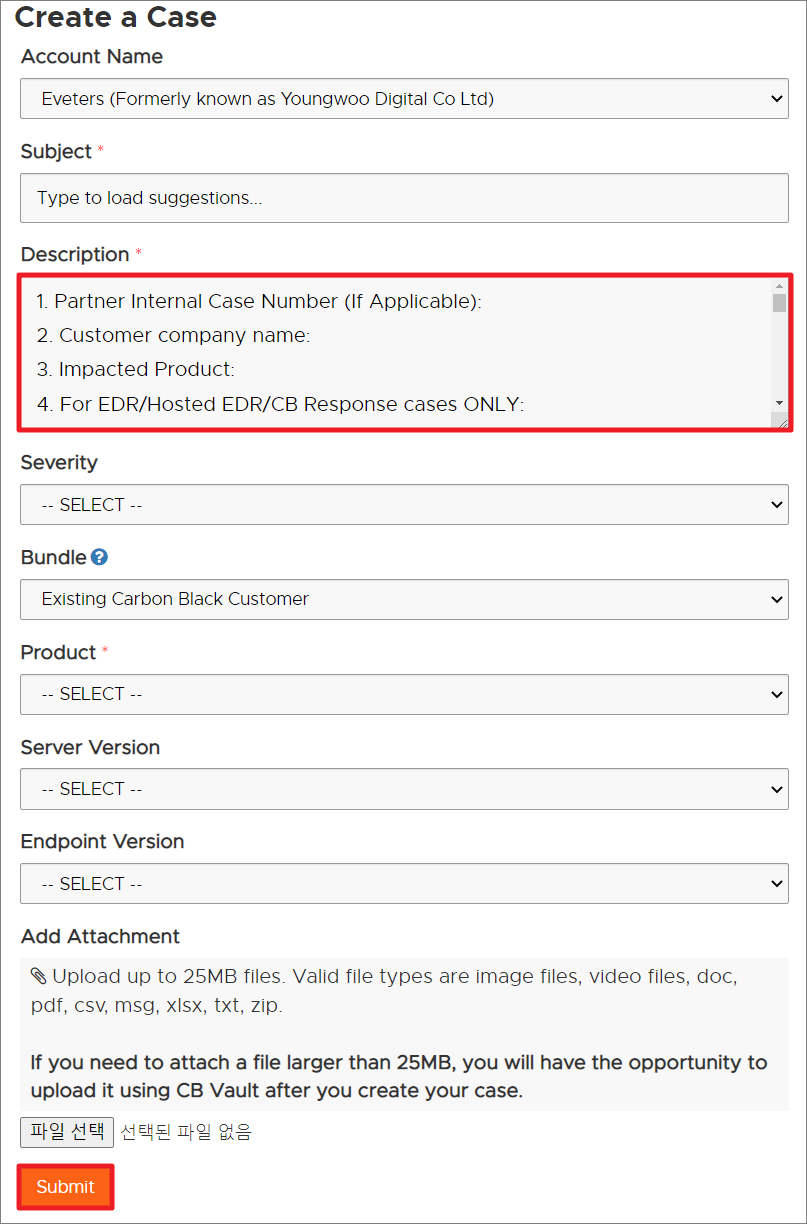](https://bs.etevers.tech/uploads/images/gallery/2023-02/IO5image.png) SR 등록에 필요한 정보를 기입합니다. \[Description\] 항목은 아래와 같은 추가 정보 작성이 필요합니다.1. Partner Internal Case Number (If Applicable) : 2. Customer company name : 3. Impacted Product : 4. For EDR/Hosted EDR/CB Response cases ONLY : a. On prem or Cloud : b. Instance alias : 5. For Carbon Black Cloud cases ONLY : a. Production environment : b. orgID : c. Sensor Name/ID : 6. Server version : 7. Sensor version : 8. Number of sensors impacted : 9. OS of impacted endpoints : 10. Issue start time : 11. Issue description : 12. Are additional AV/Security Products installed : Yes/No 13. AV exclusion in place and verified to be correct : Yes/No 14. If AV exclusions have been verified are they the most current recommended exclusion : 15. Keywords searched on the User eXchange : 16. Troubleshooting steps done so far in Partner Support case : 17. Logs collected : 18. Log findings from Partner Support Review :
작성이 완료되면 \[Submit\] 버튼을 클릭하여 Case 를 Open 합니다. ### 첨부 파일 업로드 케이스 해결을 위한 로그/이미지/비디오/문서 등의 파일 첨부 시, 25MB 가 넘는 파일은 CB Vault 를 이용하여 업로드를 진행합니다.첨부 파일의 용량이 25MB 이하인 경우 : \[파일 선택\] 버튼 클릭하여 업로드 진행합니다.
[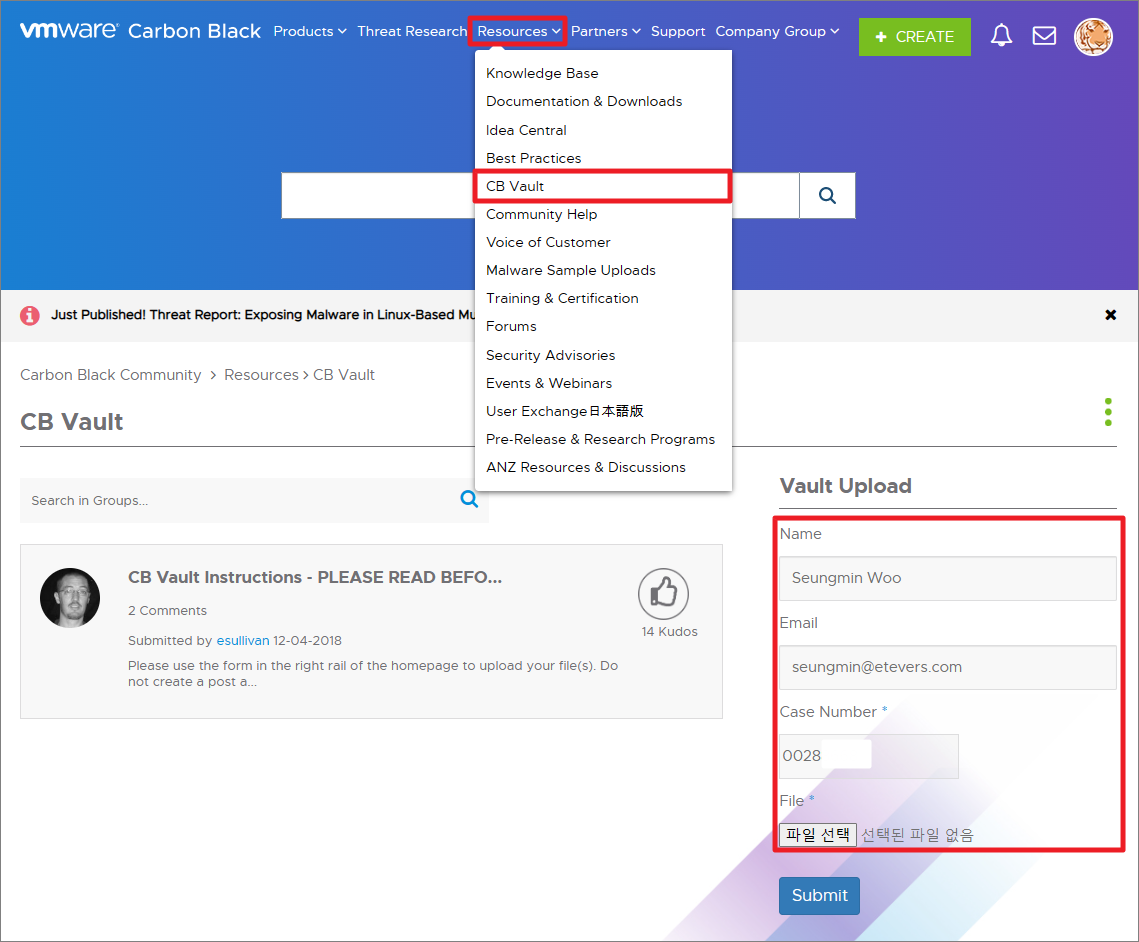](https://bs.etevers.tech/uploads/images/gallery/2023-03/yeYimage.png) \[Resource\] > \[CB Vault\] 메뉴를 클릭하여 이동하여 아래 정보를 기입합니다. \- Name : \- Email : \- Cast Number : \- File : \[Submit\] 버튼을 클릭하여 첨부파일 업로드를 완료합니다.