**로그인 방법** | **첫 번째 로그인 단계** | **두 번째 로그인 단계** |
|---|---|---|
| 패스워드 없는 로그인 | 로그인 승인 | 해당 없음 |
| 2단계 인증 | 암호 | 로그인 승인 |
| 2단계 인증 | 암호 | 일회용 암호 (OTP) |
[Google Android - https://play.google.com/store/apps/details?id=com.synology.securesignin&hl=ko&gl=US](https://play.google.com/store/apps/details?id=com.synology.securesignin&hl=ko&gl=US)
Apple OS - [https://apps.apple.com/kr/app/synology-secure-signin/id1513105891](https://apps.apple.com/kr/app/synology-secure-signin/id1513105891)
OTP 값 입력 없이 스마트폰에서 Synology Secure Signin의 접속 허용 단추를 눌러 사용할 수 있습니다. 1. 다음 단계를 수행하여 모바일 장치에 **Synology Secure SignIn** 앱을 설치합니다. 2. **Secure SignIn** 앱에서 **+** 아이콘을 클릭하여 화면에서 QR 코드를 스캔해 장치를 추가합니다. 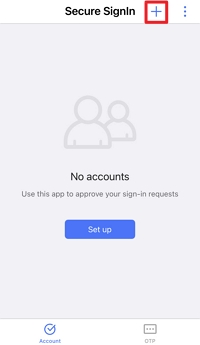 3. QR 코드를 스캔하면 대체 로그인 방법으로 **확인 코드(OTP)**를 활성화하라는 메시지가 표시됩니다. 4. QR 코드를 스캔하고 앱의 OTP 페이지에 표시된 OTP를 마법사에 입력하여 확인합니다. 5. 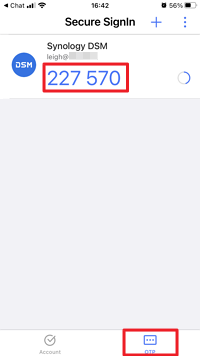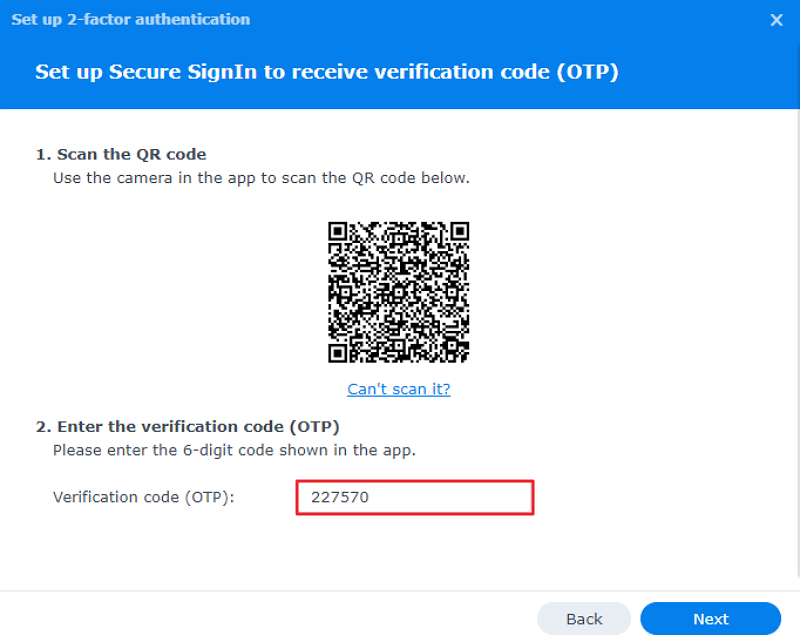 6. 다음에 로그인할 때 패스워드를 입력한 후 로그인을 승인하려면 **Secure SignIn** 앱을 열기만 하면 됩니다. 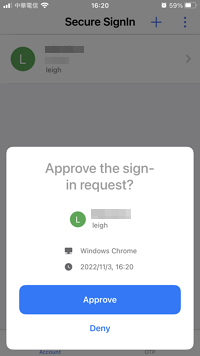 ### 2.2. 검증 코드 (One Time Password)이미 사용 중인 OTP 앱 또는 서비스가 있을 경우 사용할 수 있습니다. (예: Google 인증기, MS 인증기, Salsforce 인증기 등)
Google Android: [https://play.google.com/store/apps/details?id=com.google.android.apps.authenticator2](https://play.google.com/store/apps/details?id=com.google.android.apps.authenticator2)
Apple OS: [https://apps.apple.com/kr/app/google-authenticator/id388497605](https://apps.apple.com/kr/app/google-authenticator/id388497605)
1. \[다음\]을 클릭합니다. [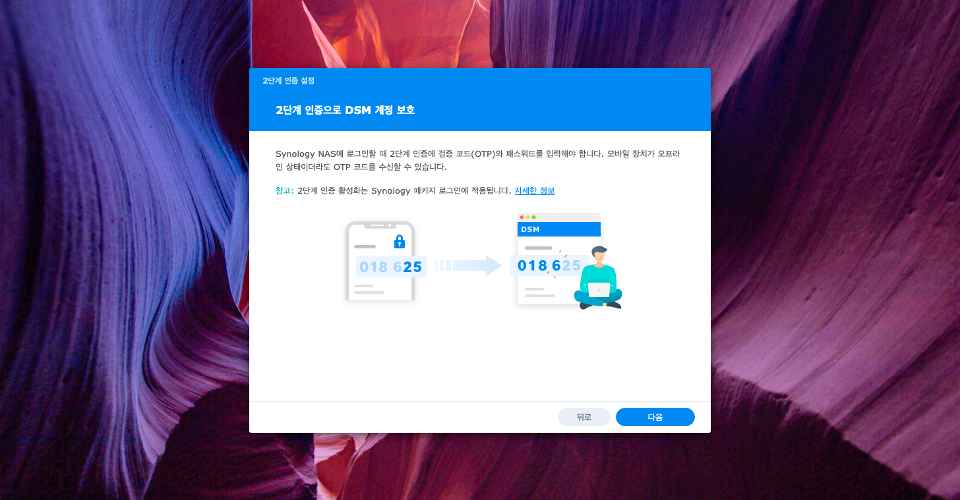](https://bs.etevers.tech/uploads/images/gallery/2023-03/27Uimage.png) 2. \[다음\]을 클릭하고 스마트폰에 2차 인증을 위한 앱을 검색합니다. [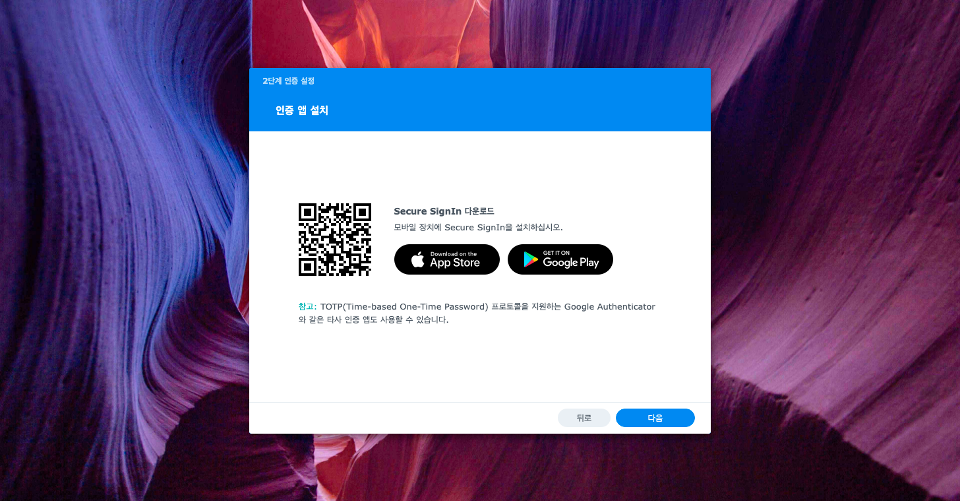](https://bs.etevers.tech/uploads/images/gallery/2023-03/8ZYimage.png) 3. Synology Secure Signin 또는 Google OTP와 같은 2FA 인증기를 스마트폰 유형 별 앱 스토어에서 설치합니다. [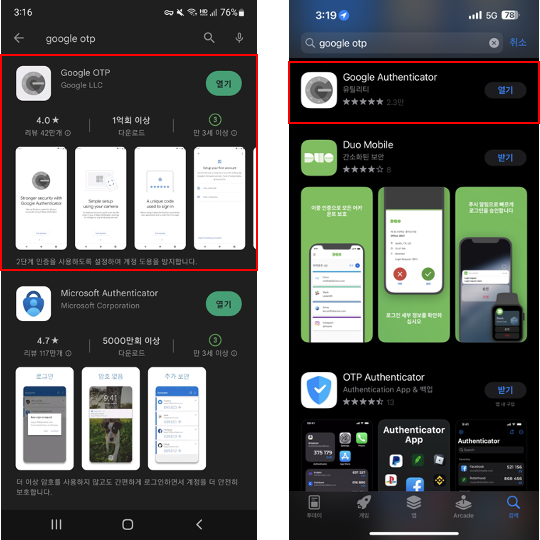](https://bs.etevers.tech/uploads/images/gallery/2023-03/CORimage.png) 4. Google OTP 앱 실행후 \[시작하기\] - \[QR 코드 스캔\] 을 클릭합니다. (카메라 권한 요청시 허용) [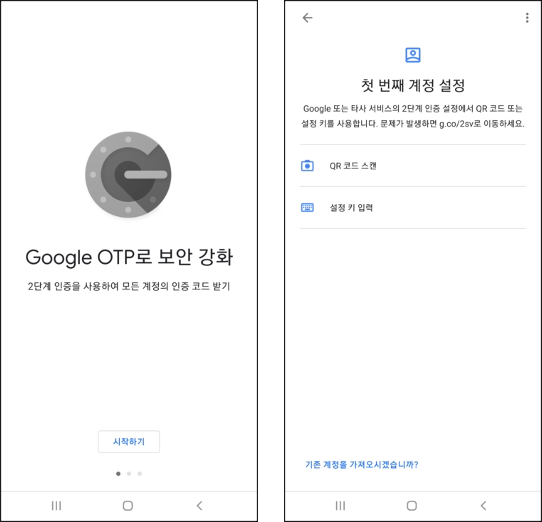](https://bs.etevers.tech/uploads/images/gallery/2023-03/2rEimage.png) 5. 웹브라우저에 보이는 QR코드를 스캔하여 2차인증 앱에 등록합니다. 앱에 등록이 되면 6개의 숫자가 표시됩니다. 표시되는 숫자를 \[검증 코드(OTP) \]에 입력 후 \[다음\]을 클릭합니다. [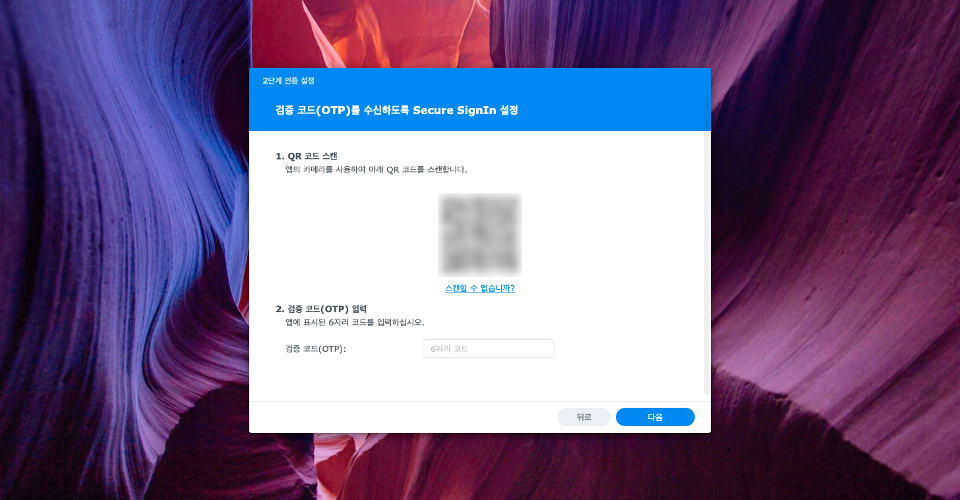](https://bs.etevers.tech/uploads/images/gallery/2023-03/zXBimage.png) 6. 정상적으로 2차인증이 등록되었습니다. [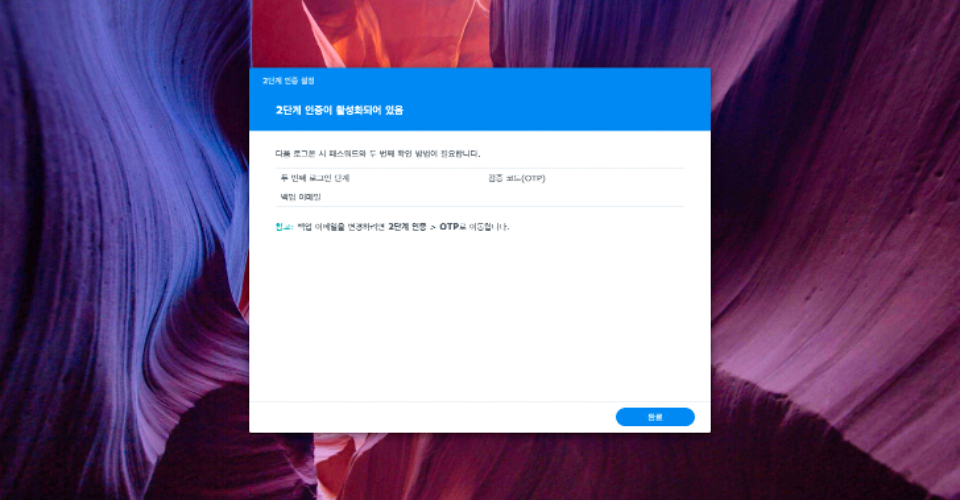](https://bs.etevers.tech/uploads/images/gallery/2023-03/LLRimage.png) ## 3. 이용 2차인증이 등록되면 외부에서 NAS 로그인 시 위의 검증 코드 입력 페이지가 추가됩니다. [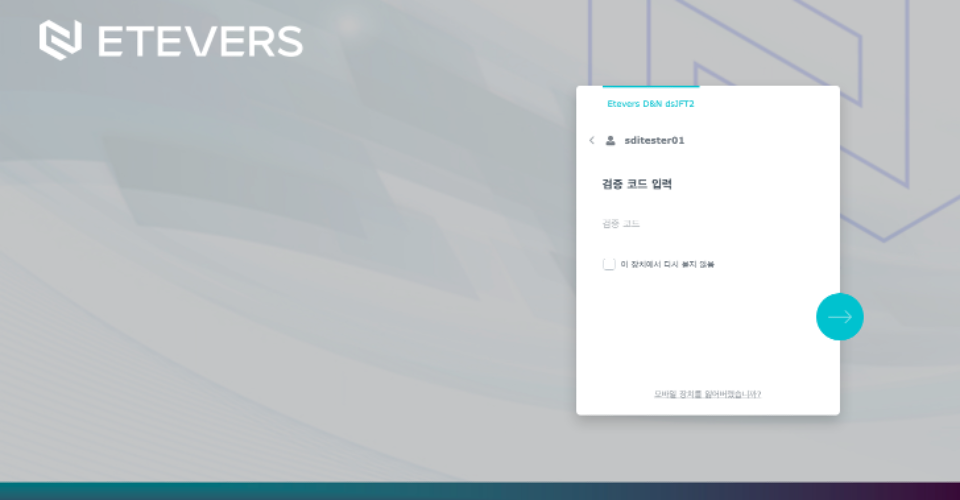](https://bs.etevers.tech/uploads/images/gallery/2023-03/Fgximage.png) ## 4. 패스워드 변경 1\. 웹을 통해 NAS 로그인하여 오른쪽 위의 사람모양을 클릭 후 \[개인\] 버튼을 클릭합니다. [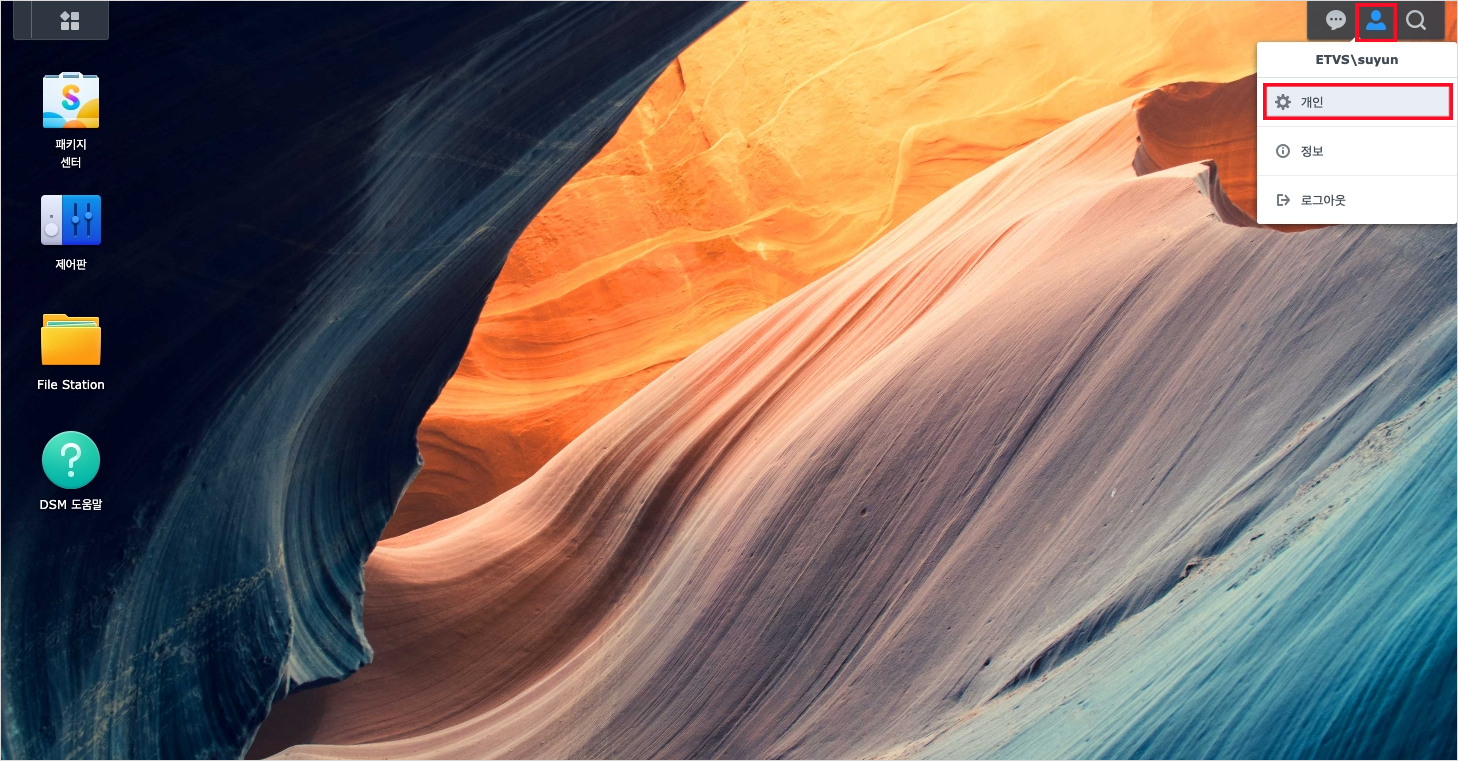](https://bs.etevers.tech/uploads/images/gallery/2023-03/doEimage.png) 2\. 오른쪽 아래에 있는 \[패스워드 변경\] 버튼을 클릭합니다. [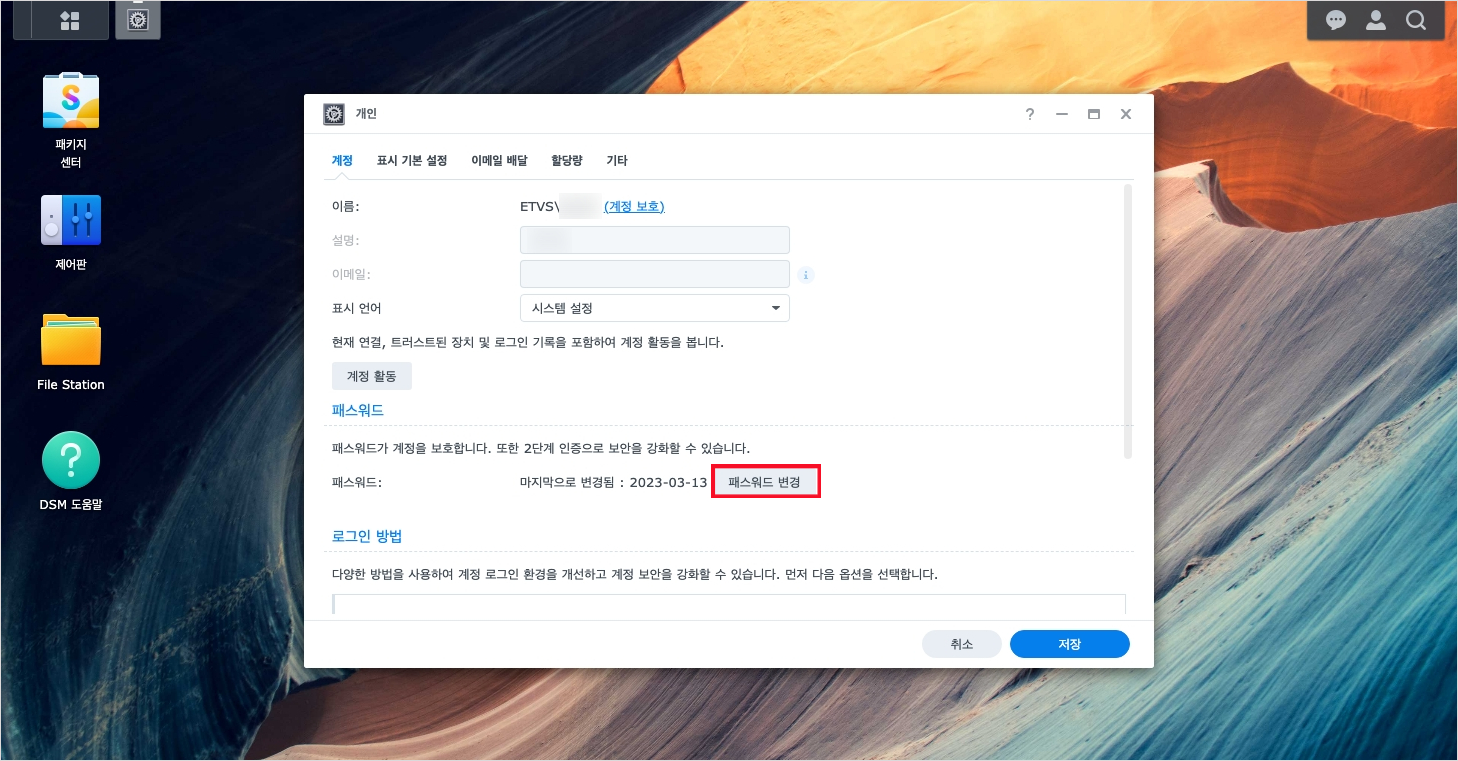](https://bs.etevers.tech/uploads/images/gallery/2023-03/iFrimage.png) 3\. 변경 할 패스워드를 입력하고 \[적용\] 버튼을 클릭합니다. [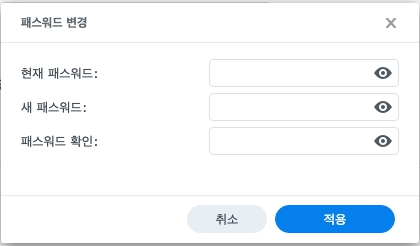](https://bs.etevers.tech/uploads/images/gallery/2023-03/rdoimage.png)