Omnissa Customer Connect URL: [https://customerconnect.omnissa.com/](https://customerconnect.omnissa.com/ "https://customerconnect.omnissa.com/")
## 1. 신규 회원| [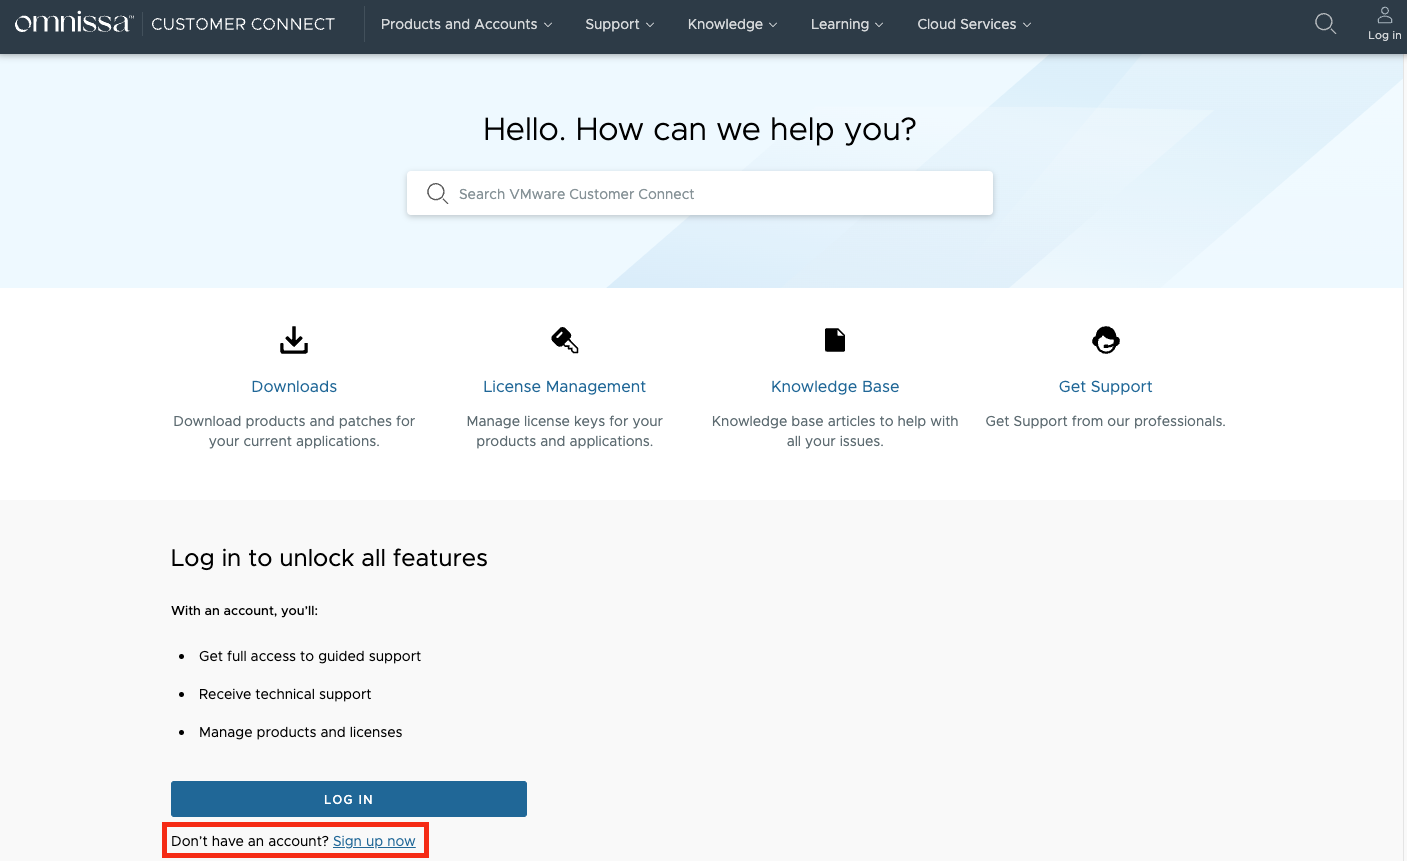](https://bs.etevers.tech/uploads/images/gallery/2025-10/s4wimage.png) | - Omnissa Customer Connect 페이지 접속
- 왼쪽 사이트 화면에서 'Sign up now' 버튼을 클릭하여 회원가입 진행
*기존 VMware Customer Connect의 계정이 있는 경우,* *기존 계정을 사용하므로 해당 절차는 필요하지 않습니다.* |
Omnissa Customer Connect 를 개인용으로 사용할 경우 진행
| [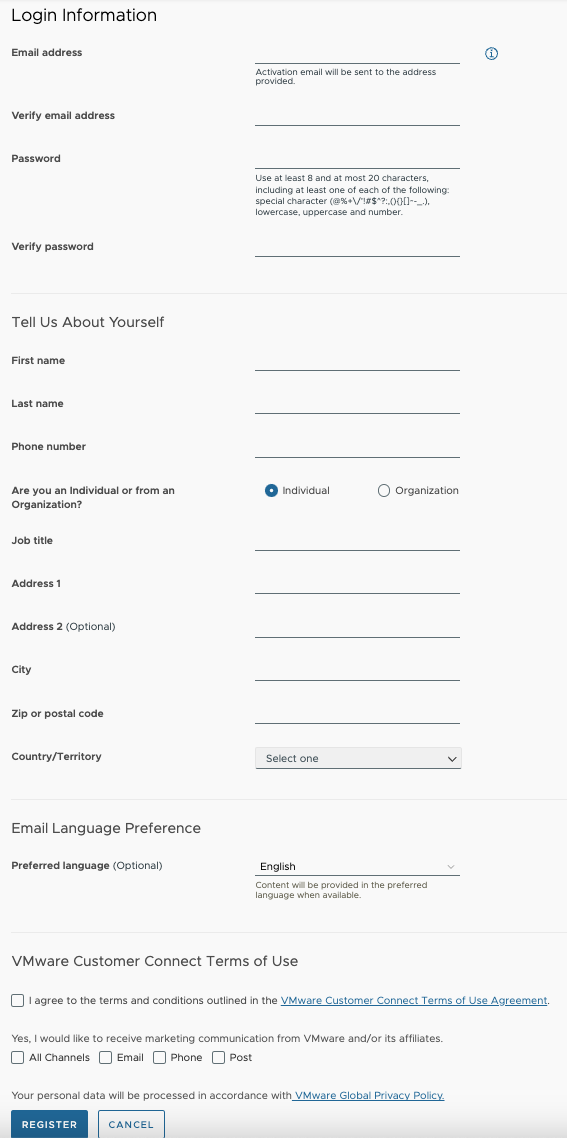](https://bs.etevers.tech/uploads/images/gallery/2025-10/oDhimage.png) | - 회원가입에 필요한 정보 입력 - Email address : 계정으로 사용할 이메일 주소 - 이메일 수신이 필요하므로, 수신 가능한 이메일 주소 입력 필요 - Verify email address : 이메일 재차 검증 - Password : 비밀번호 입력 - 최소 8글자 ~ 최대 20글자 - 특수문자/소문자/대문자/숫자 하나 이상 포함 - First name : 이름 (영문) 입력 - Last name : 성 (영문) 입력 - Phone number : 핸드폰 번호 (82) 입력 - Are you an Individual or from an Organization? : individual 선택 - Job title : 직책 (영문) 입력 - Address 1 : 주소 (영문) 입력 - City : 도시 (영문) 입력 - Zip or postal code : 우편번호 - Country/Territory : 국가 (Korea, Republic of) - VMware Customer Connect Terms of Use - 이용 약관 동의 (필수) - 마케팅 정보 수신 (옵션) - \[REFISTER\] 버튼 클릭하여 회원가입 완료 진행 |
Omnissa Customer Connect 를 업무용으로 사용할 경우 진행
| [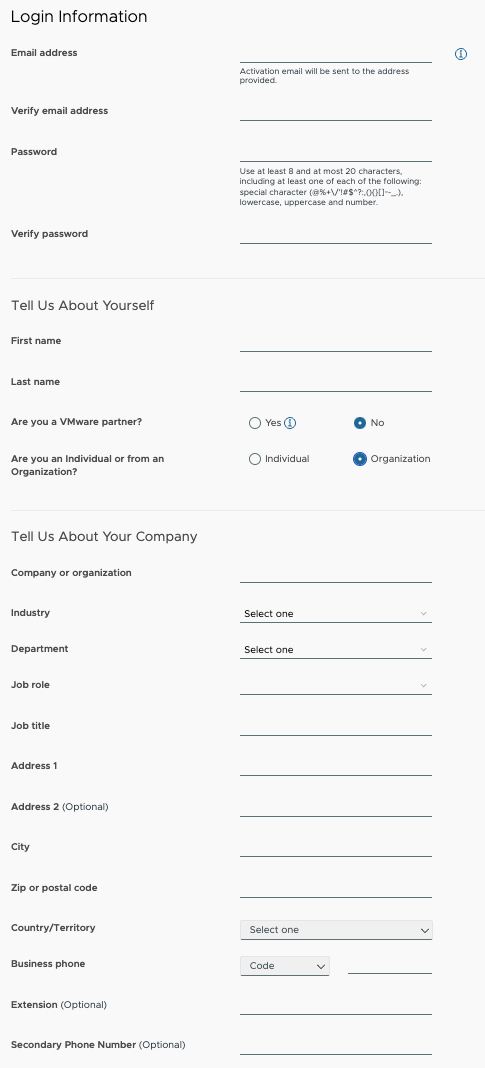](https://bs.etevers.tech/uploads/images/gallery/2025-10/4ZCimage.png) | - 회원가입에 필요한 정보 입력 - Email address : 계정으로 사용할 이메일 주소 - 이메일 수신이 필요하므로, 수신 가능한 이메일 주소 입력 필요 - Verify email address : 이메일 재차 검증 - Password : 비밀번호 입력 - 최소 8글자 ~ 최대 20글자 - 특수문자/소문자/대문자/숫자 하나 이상 포함 - First name : 이름 (영문) 입력 - Last name : 성 (영문) 입력 - Are you a VMware partner? - Yes : 소속 회사가 VMware Partner 등록됨 - No : 소속 회사가 VMware Partner 등록안됨 - Are you an Individual or from an Organization? : Organization 선택 - Company or organization : 회사 영문명 - Industry : 회사 산업 선택 - Department : 부서 선택 - Job role : 직무 역할 (영문) 입력 - Job title : 직함 (영문) 입력 - Address 1 : 주소 (영문) 입력 - City : 도시 (영문) 입력 - Zip or postal code : 우편번호 입력 - Country/Territory : Korea, Republic of 선택 - Business phone : +82 선택 후 핸드폰 번호 입력 - VMware Customer Connect Terms of Use - 이용 약관 동의 체크 (필수) - 마케팅 정보 수신 (옵션) - \[REFISTER\] 버튼 클릭하여 회원가입 완료 진행 |
| [](https://bs.etevers.tech/uploads/images/gallery/2025-10/Jq4image.png) | - Omnissa Customer Connect 페이지 접속 - 왼쪽 화면에 위치한 \[LOG IN\] 버튼 또는 오른쪽 상단에 위치한 \[Log in\] 버튼 클릭 |
| [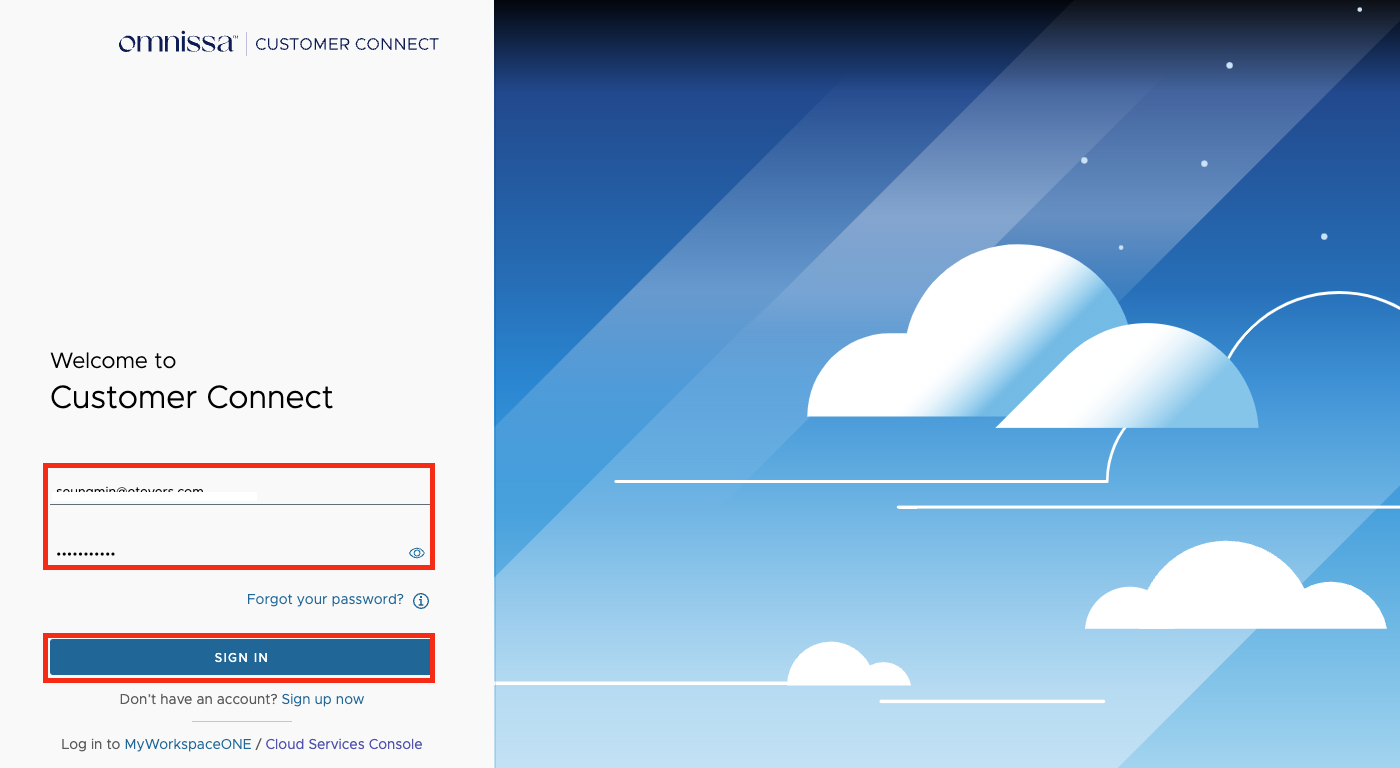](https://bs.etevers.tech/uploads/images/gallery/2025-10/90yimage.png) | - 기존 VMware Customer Connect 사이트에서 사용했던 기존 계정 입력 - \[SIGN IN\] 버튼 클릭하여 로그인 진행 |
해당의 경우, 권한이 있는 관리자 계정 (ex : Super User) 으로 진행 필요합니다.
| [](https://bs.etevers.tech/uploads/images/gallery/2025-10/ZGpimage.png) | - \[Products and Accounts\] > \[Users and Permissions\] 메뉴 클릭 |
| [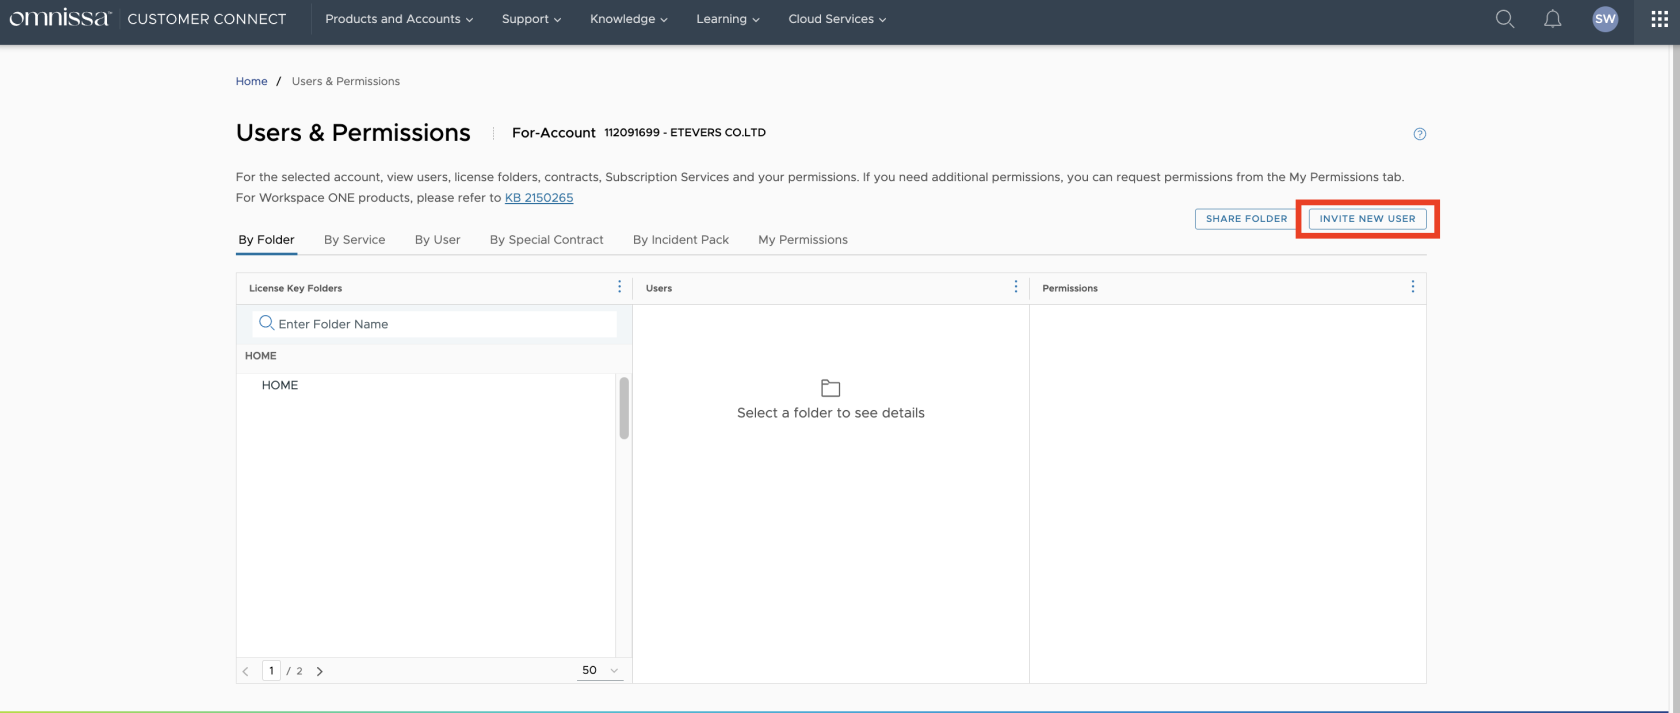](https://bs.etevers.tech/uploads/images/gallery/2025-10/ZbDimage.png) | - \[INVITE NEW USER\] 버튼 클릭 |
| [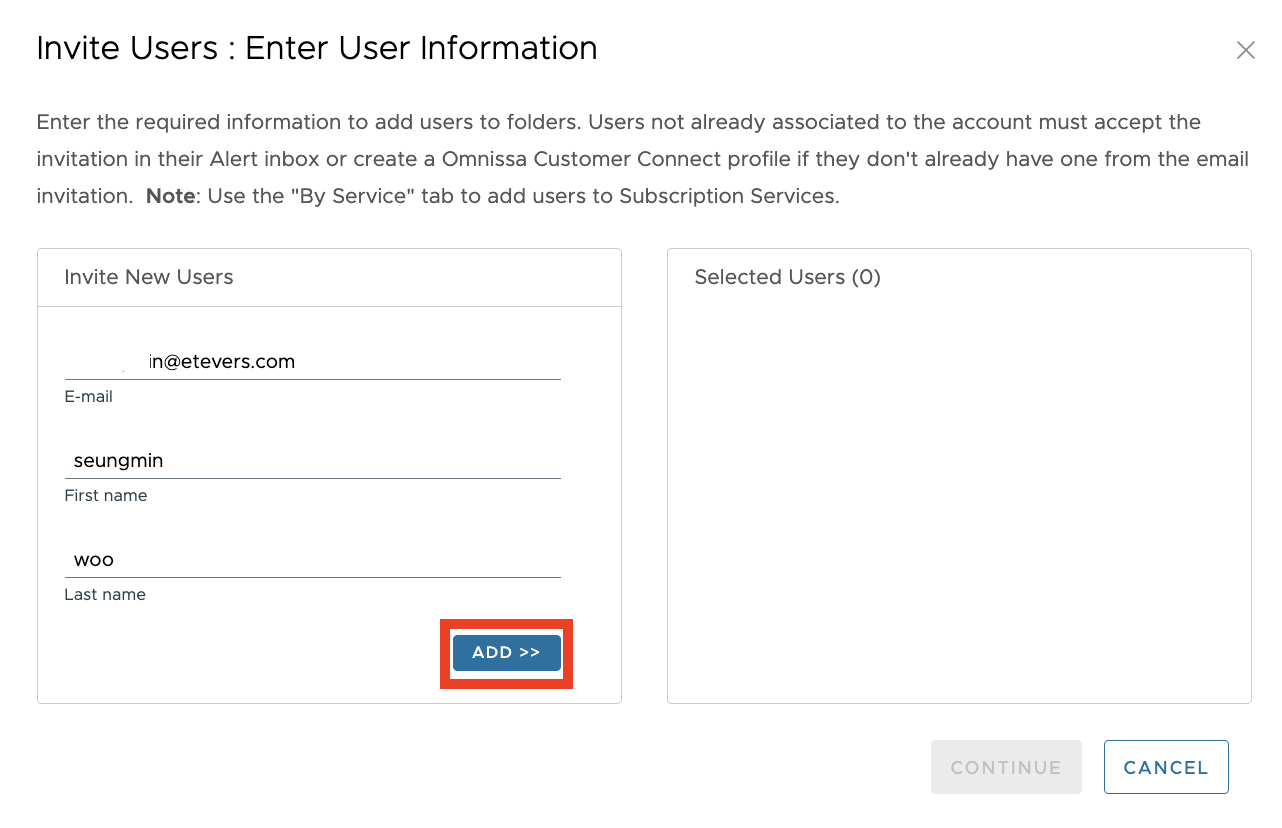](https://bs.etevers.tech/uploads/images/gallery/2025-10/K0Limage.png) | - 추가할 사용자 계정 정보 입력 - E-mail : 이메일 계정 입력 - First Name : 이름 - Last Name : 성 - \[ADD>>\] 버튼 클릭하여 계정 추가 |
| [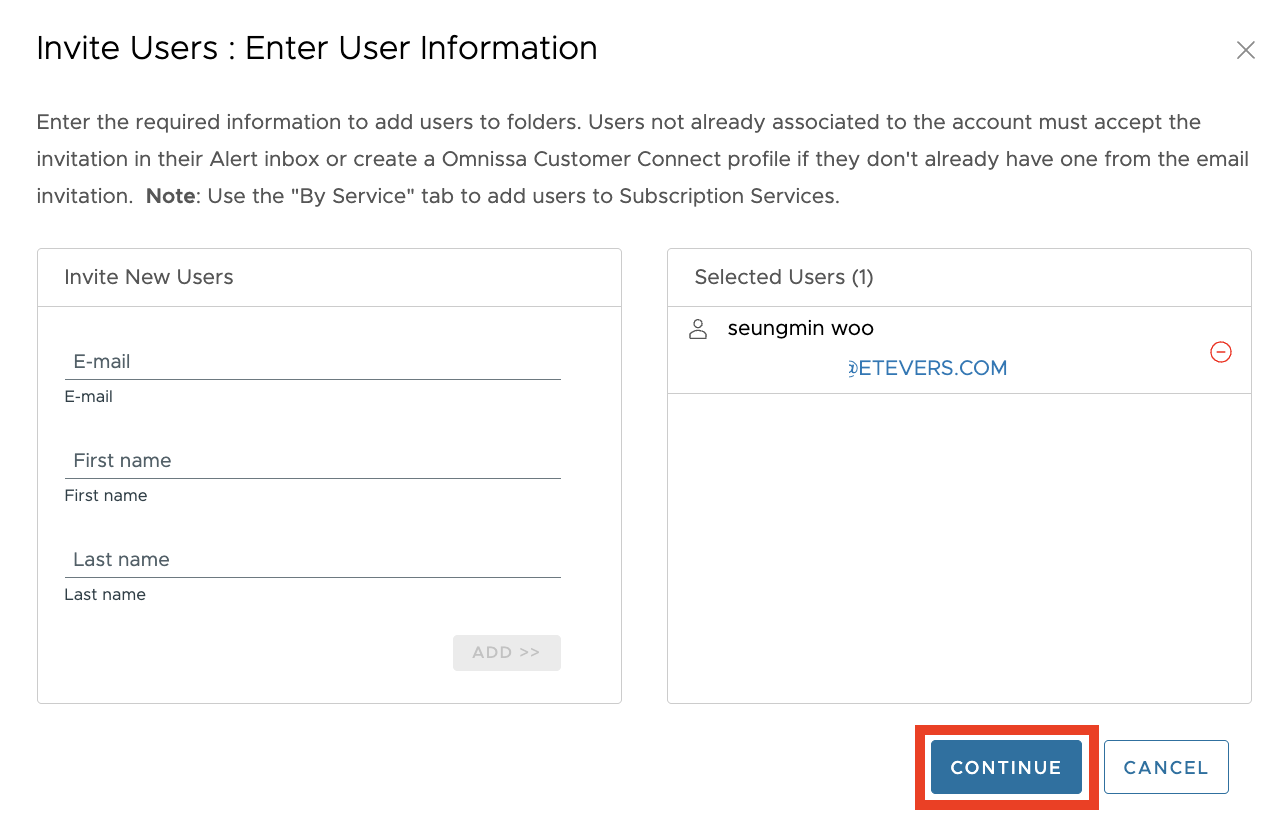](https://bs.etevers.tech/uploads/images/gallery/2025-10/UVSimage.png) | - \[Continue\] 버튼 클릭하여 다음으로 이동 |
| [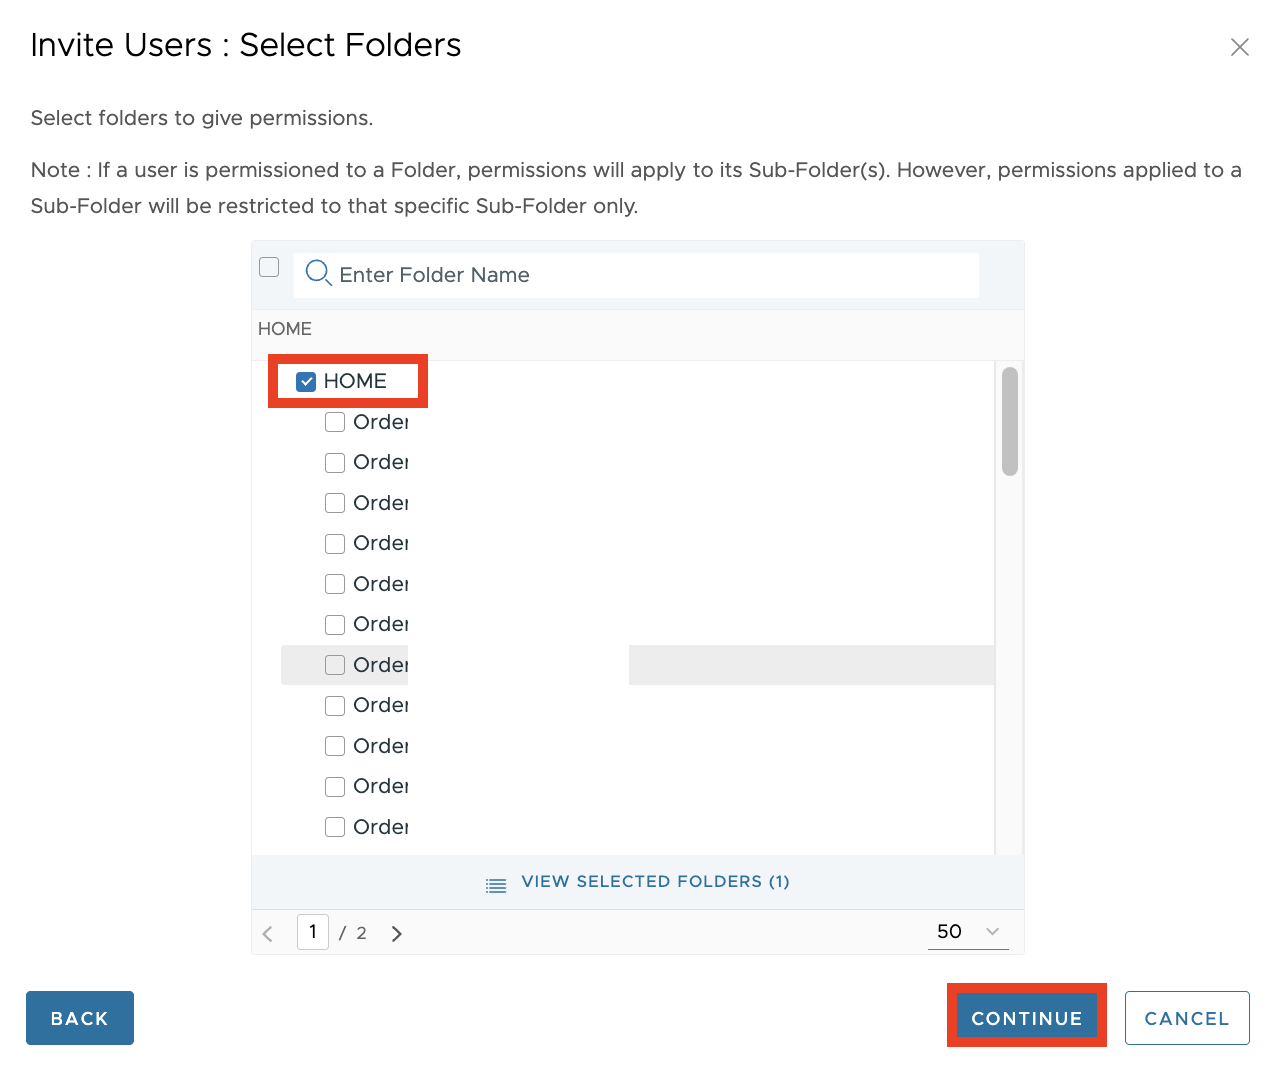](https://bs.etevers.tech/uploads/images/gallery/2025-10/LGximage.png) | - 권한 부여할 폴더 선택 - \[Continue\] 버튼 클릭하여 다음으로 이동 |
| [](https://bs.etevers.tech/uploads/images/gallery/2025-10/YiWimage.png) | - 사용자에게 부여할 권한 선택 - \[Continue\] 버튼 클릭하여 다음으로 이동 |
| [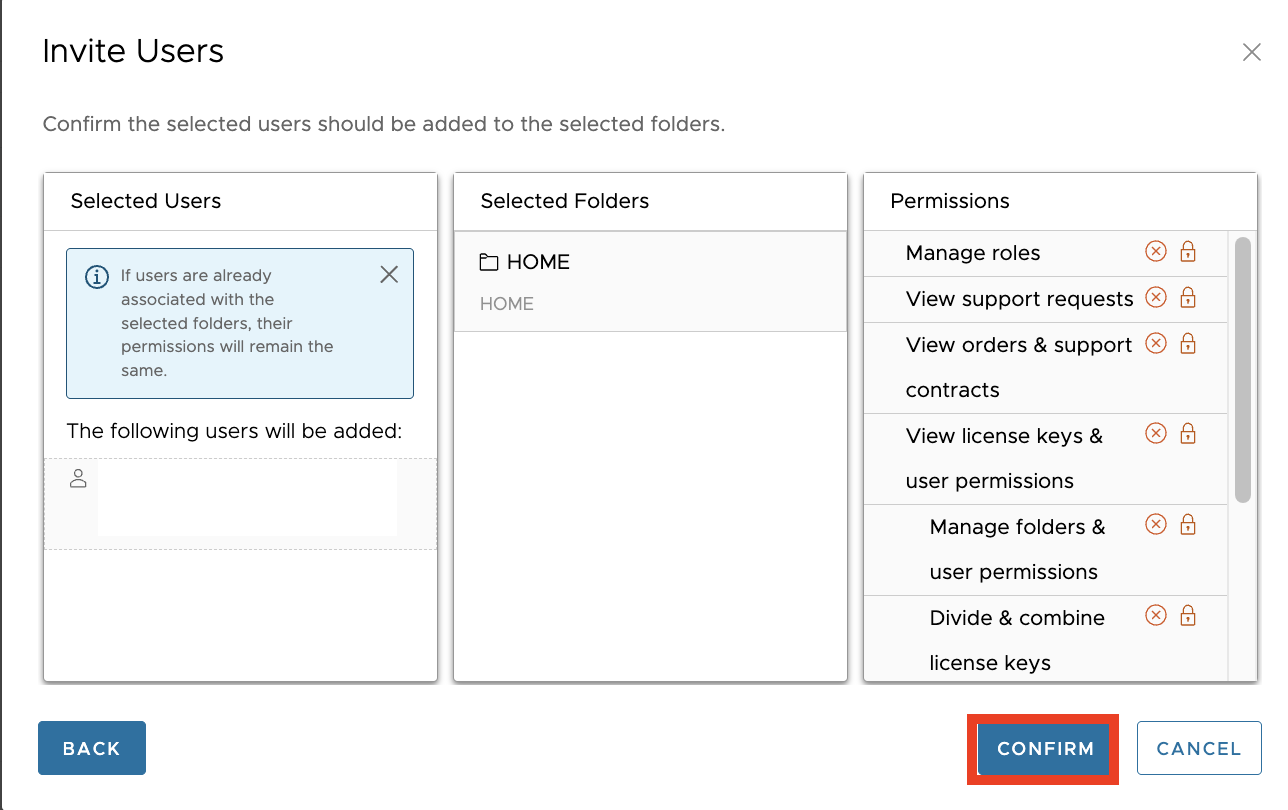](https://bs.etevers.tech/uploads/images/gallery/2025-10/p8uimage.png) | - 입력한 정보 확인 후 \[Confirm\] 버튼 클릭 |
| [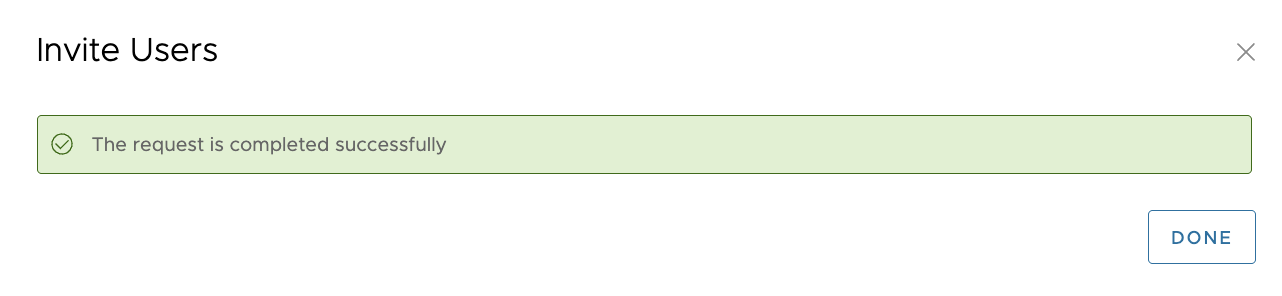](https://bs.etevers.tech/uploads/images/gallery/2025-10/kDVimage.png) | - \[Done\] 버튼 클릭하여 초대 완료 |
| [](https://bs.etevers.tech/uploads/images/gallery/2026-01/image.png) | - 초대된 사용자 계정 메일로 송신된 '초대 메일' 확인 - 링크를 통해 Customer Connect 접속 및 로그인 진행 |
| [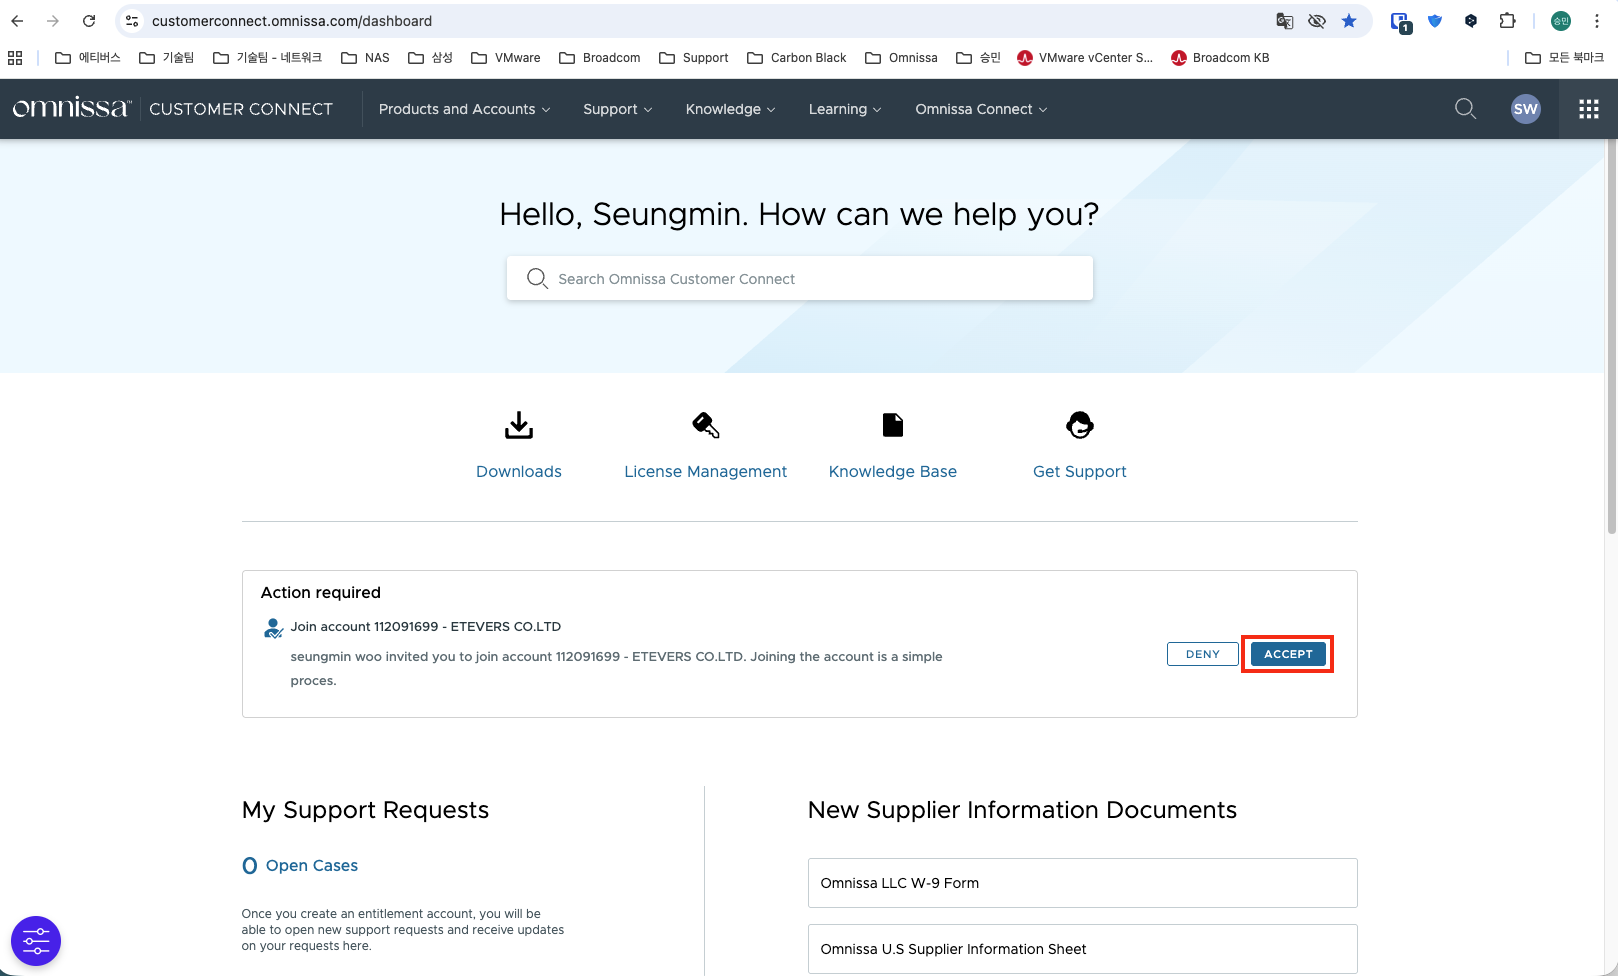](https://bs.etevers.tech/uploads/images/gallery/2026-01/9ePimage.png) | - Customer Connect 메인 화면에서 'Action required' 확인 - \[ACCEPT\] 버튼 클릭 |