| **상태** | **대상** | 범 |
검수 | 서포트 포탈 유저 | LSR |
| [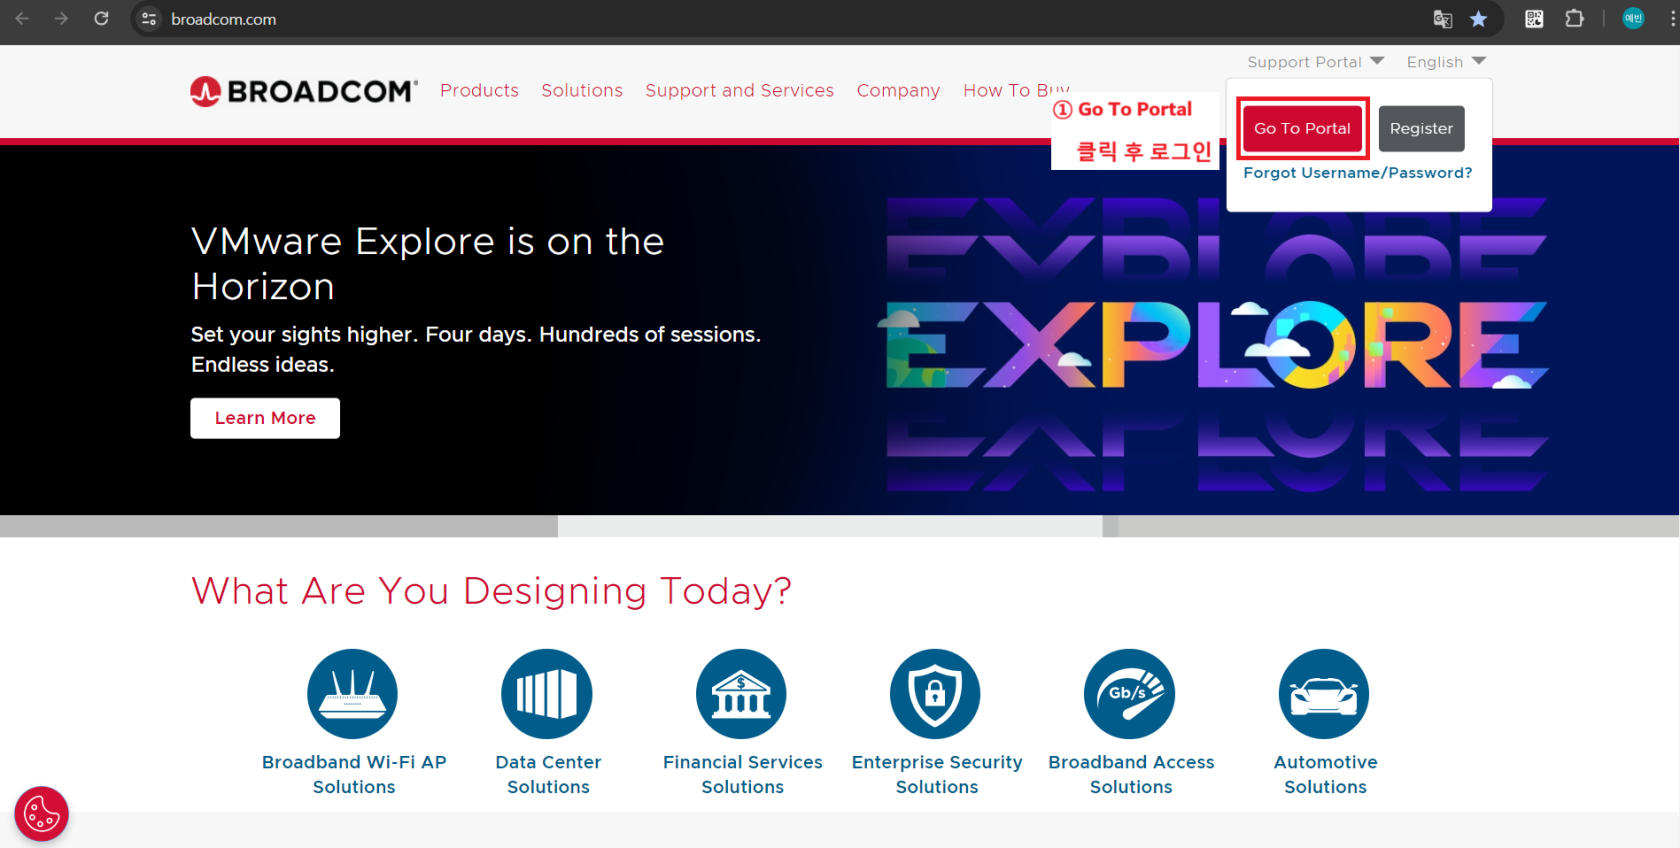](https://bs.etevers.tech/uploads/images/gallery/2025-10/pfPimage.png) | - [Broadcom Inc. | Connecting Everything](https://broadcom.com/) 접속 후 로그인 |
| [](https://bs.etevers.tech/uploads/images/gallery/2025-10/BbPimage.png) | - \[My Tools\] 클릭 |
| [](https://bs.etevers.tech/uploads/images/gallery/2025-10/l2eimage.png) | - \[Invite User\] 클릭
- 권한을 부여할 Site ID 입력
접근을 원하는 Site ID를 넣는다. |
| [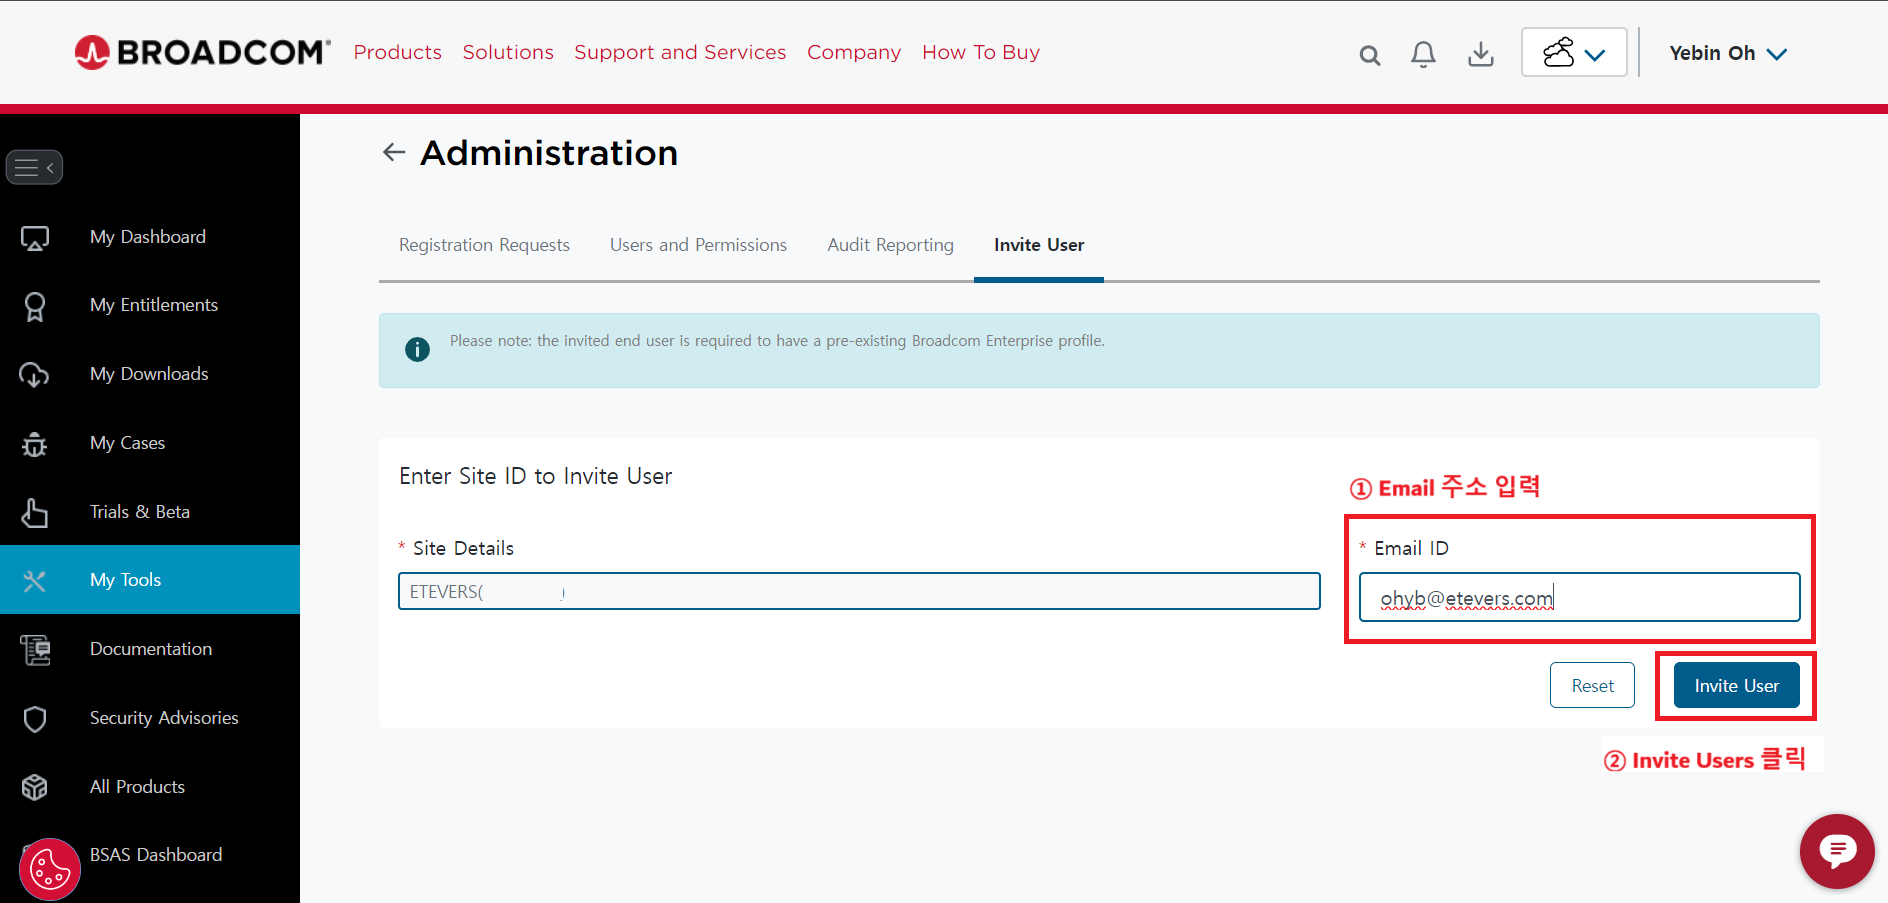](https://bs.etevers.tech/uploads/images/gallery/2025-10/wLMimage.png) | - Site ID를 입력하면 Email ID 란이 나타난다. - 초대할 파트너 계정의 이메일 입력 후 \[Invite User\] 클릭 |
| [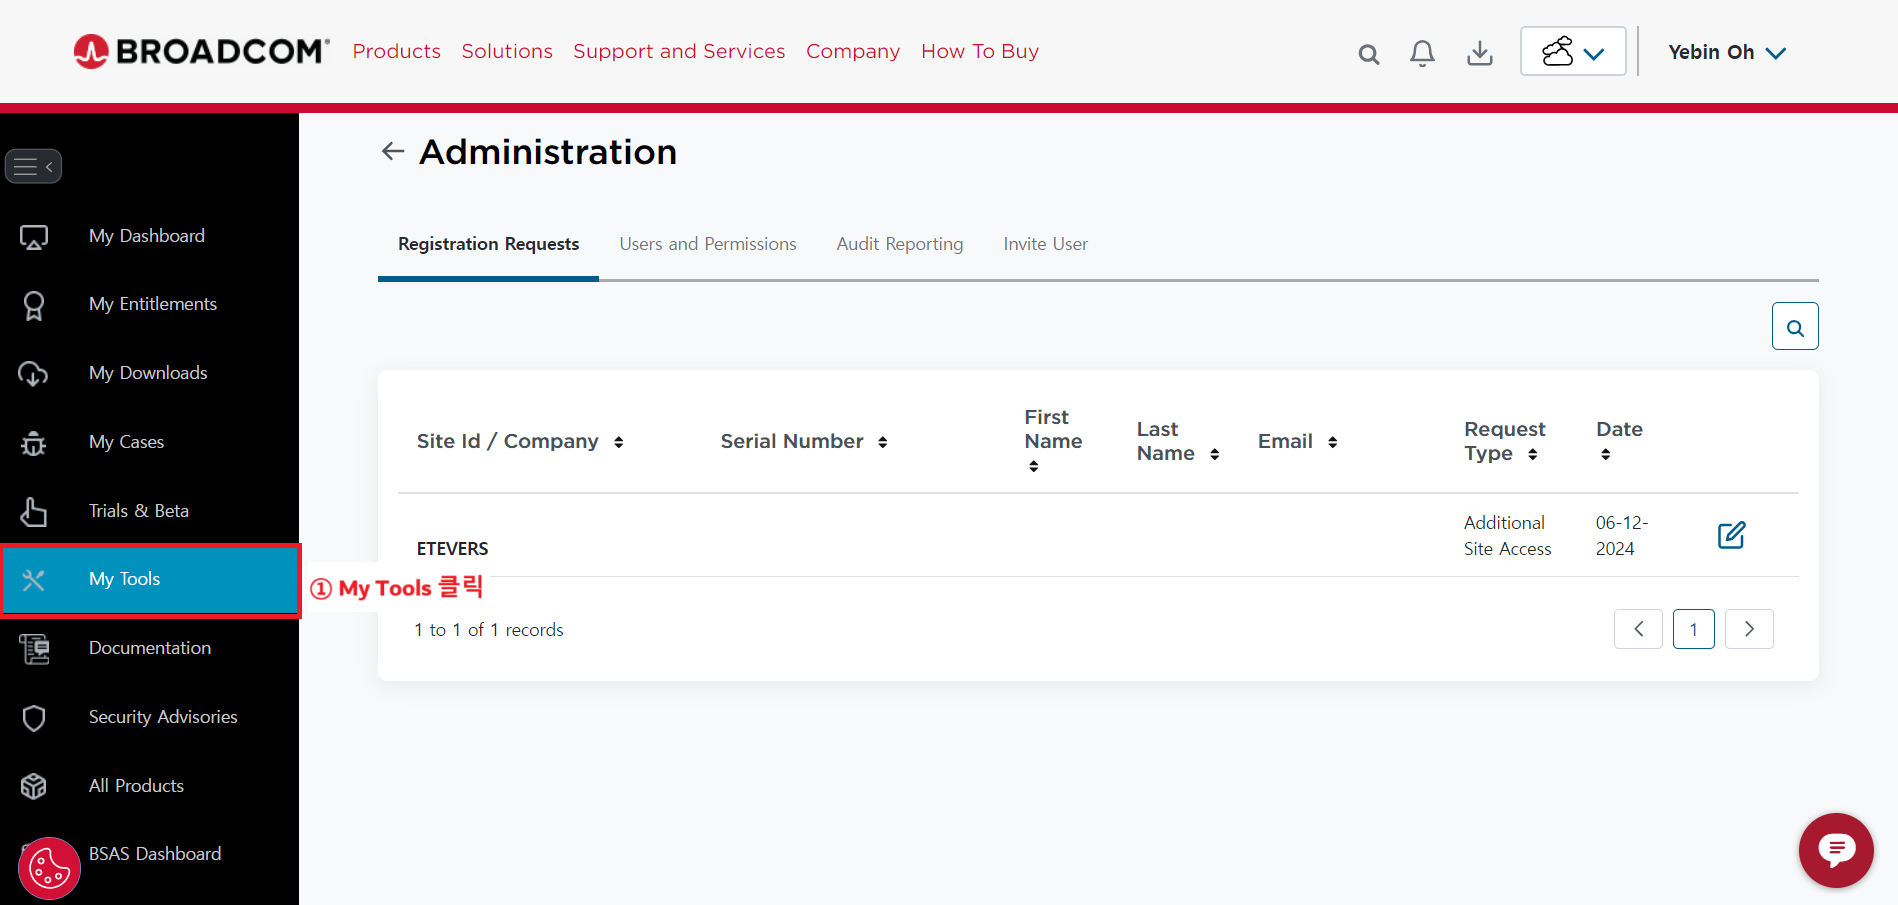](https://bs.etevers.tech/uploads/images/gallery/2025-10/8y5image.png) | - \[My Tools\] 클릭 |
| [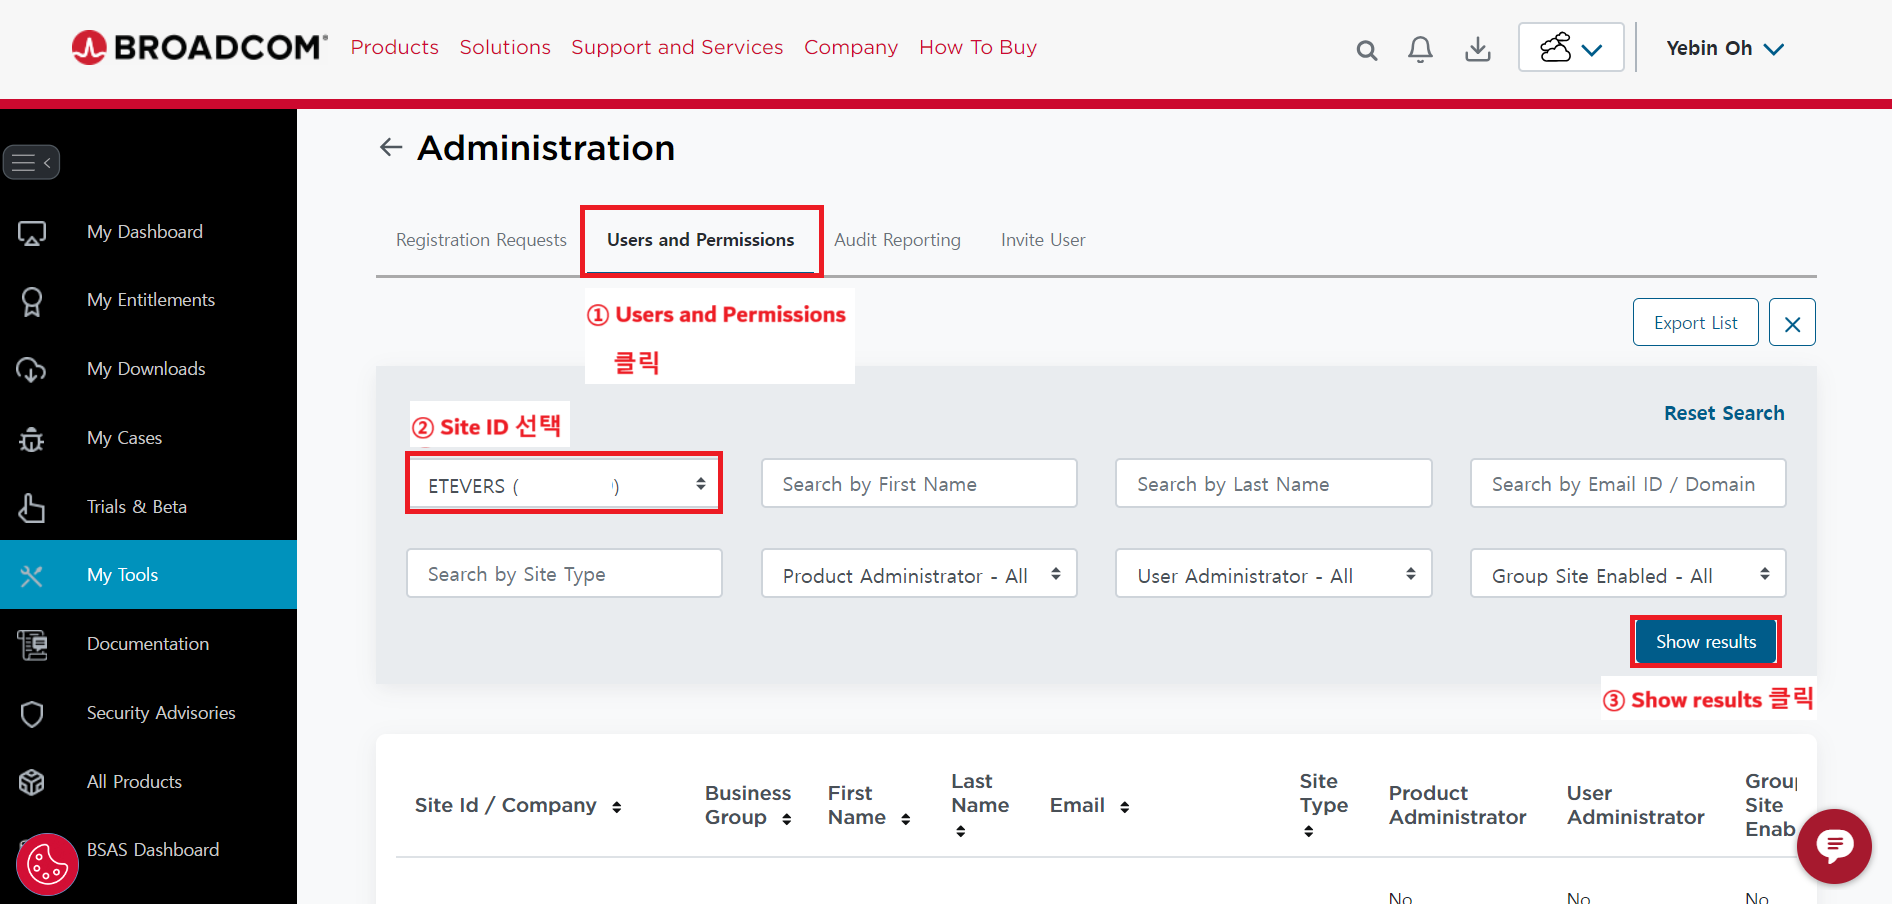](https://bs.etevers.tech/uploads/images/gallery/2025-10/pKlimage.png) | - \[User and Permission\] 클릭 - 회사명(Site ID) 선택 - \[Show results\] 클릭 |
| [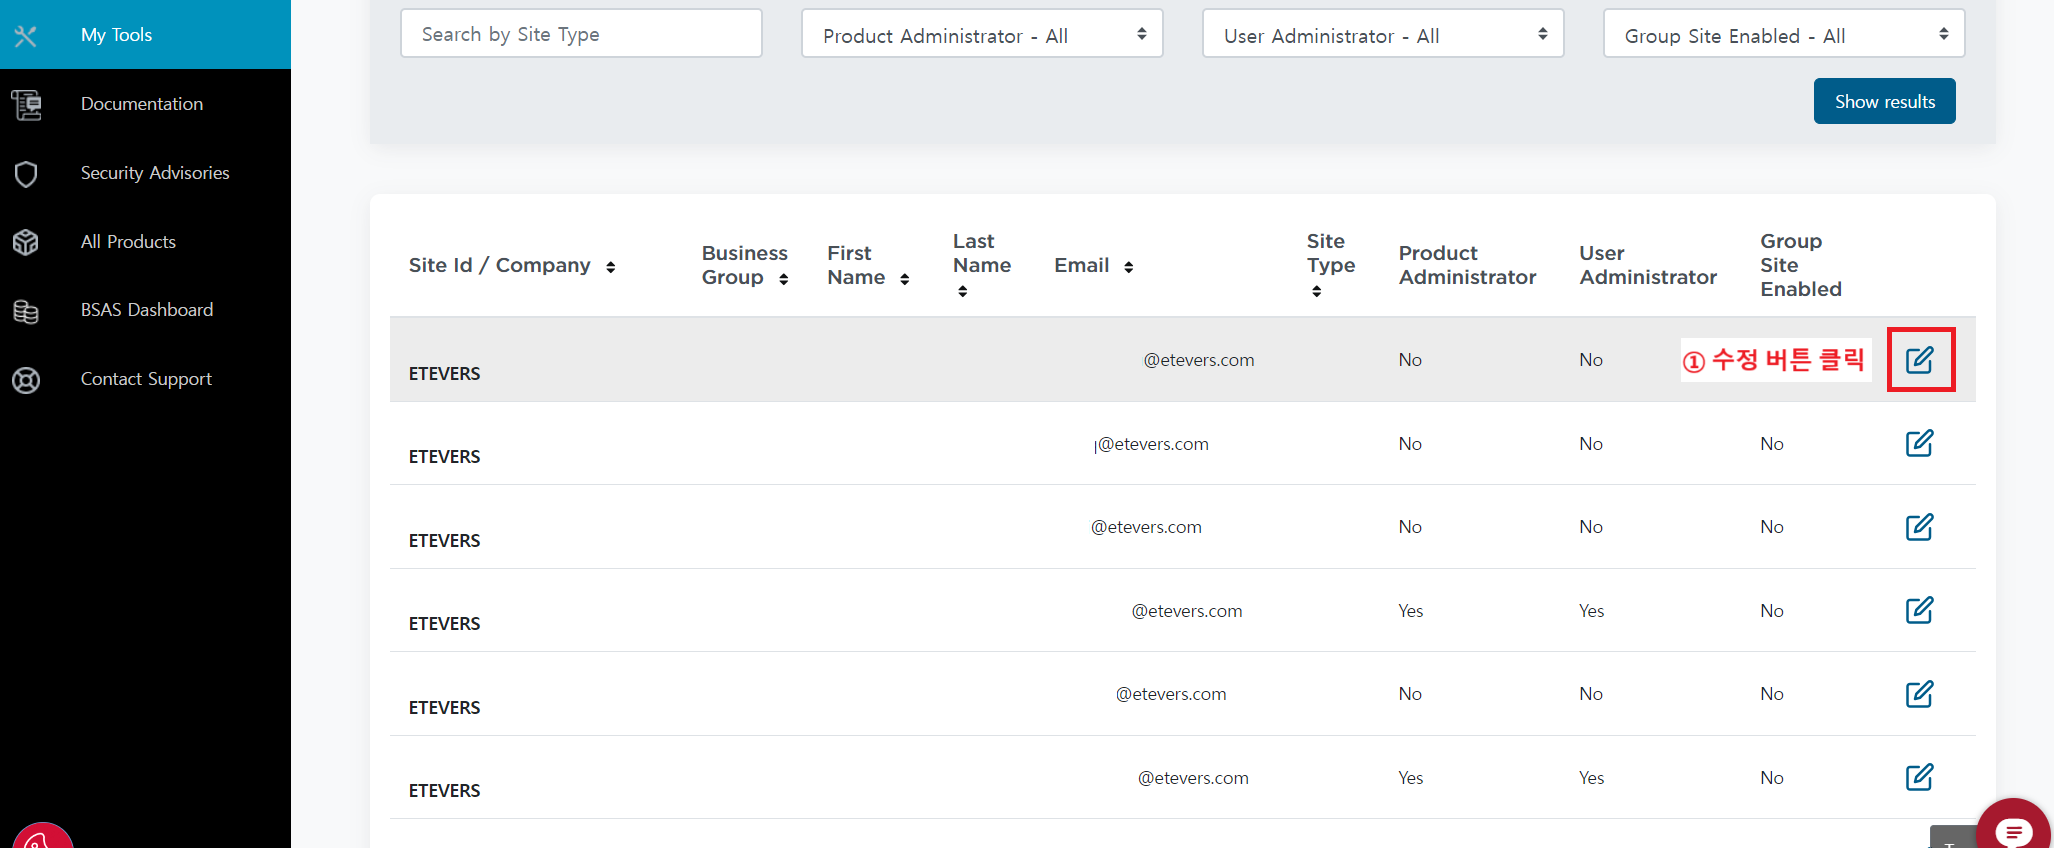](https://bs.etevers.tech/uploads/images/gallery/2025-10/Prqimage.png) | - 초대한 계정의 권한 부여를 위해 해당 계정 편집 아이콘 클릭 |
| [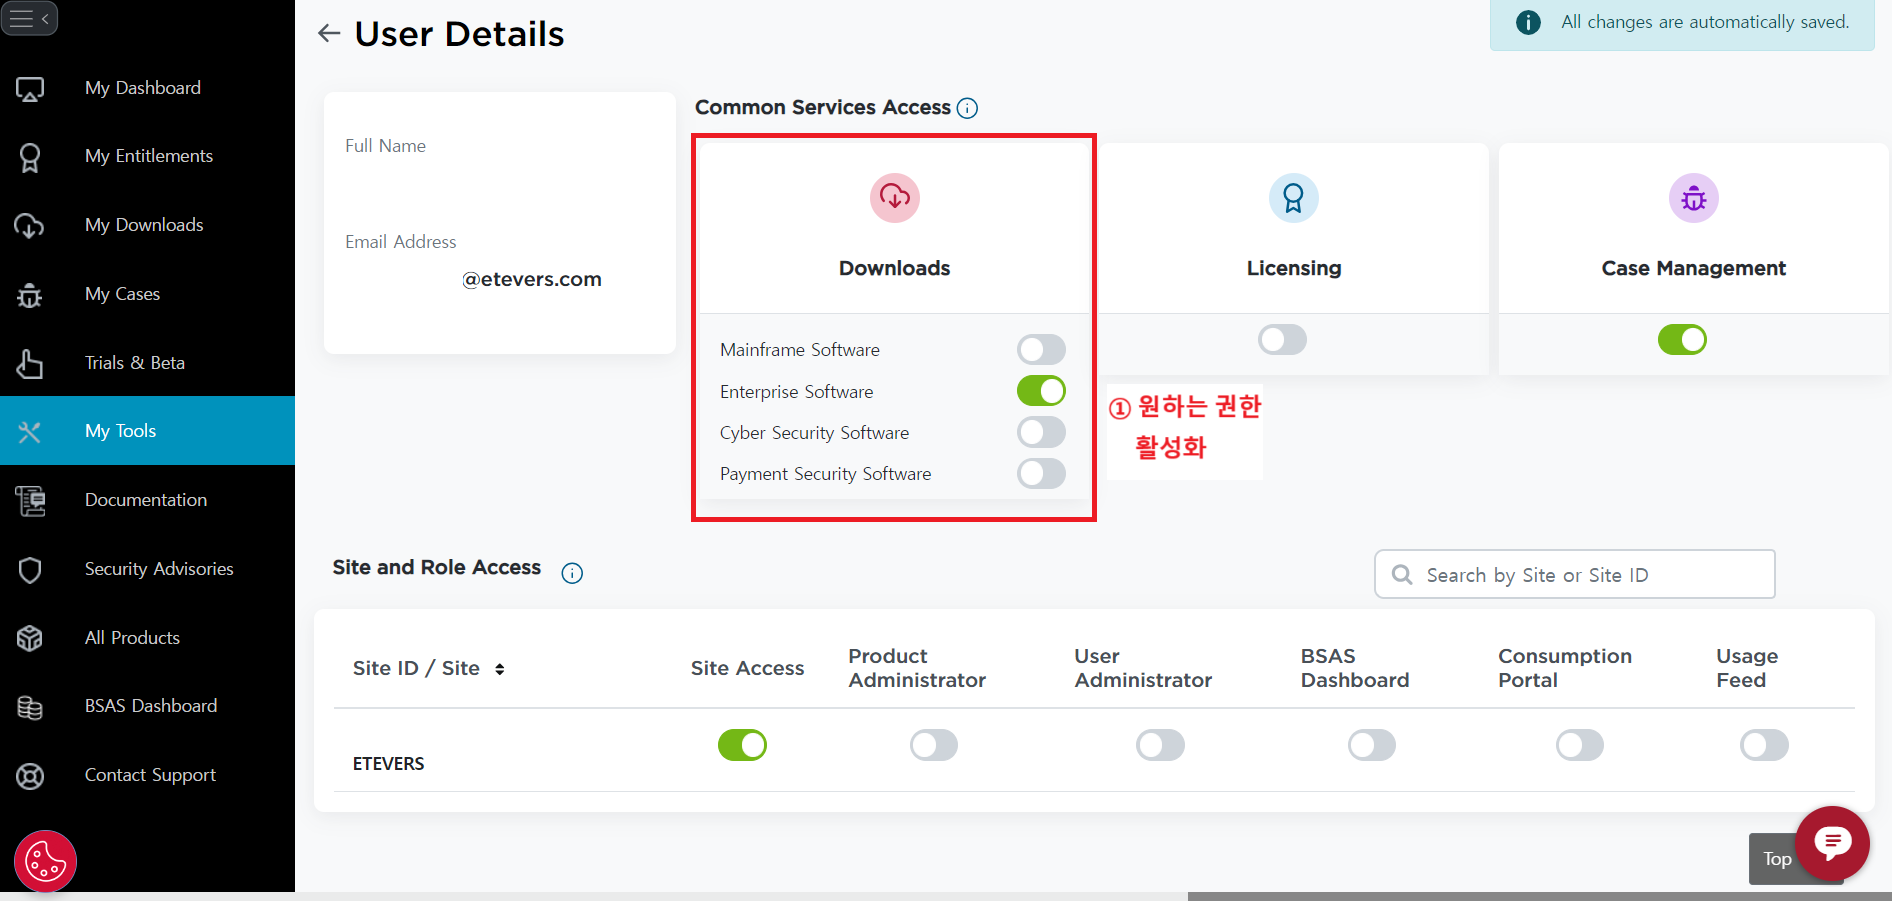](https://bs.etevers.tech/uploads/images/gallery/2025-10/3Zcimage.png) | - \[Downloads\] 부분에서 원하는 권한 부여 가능
다운로드 권한 외에 라이선스 접근, 케이스 오픈 권한, 제품 Admin 권한 등도 부여가 가능하다. |